Description
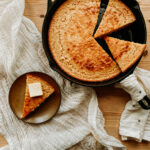
This Brown Butter Buttermilk Skillet Cornbread is my take on southern cornbread, with a lightly sweetened buttermilk base, a coarse yellow cornmeal crumb, and a perfectly caramelized crust due to the baking magic of a good cast-iron skillet. If that weren't delicious enough, this cornbread sets itself apart with a healthy dose of brown butter, which offers subtly nutty, toasty, and caramelized notes among its buttery swirls.
Ingredients
- 12 tbsp (1 1/2 sticks) unsalted butter
- 4 oz (1/2 cup) pure maple syrup, room temperature
- 16 oz (2 cups) buttermilk, room temperature
- 3 large eggs, room temperature
- 246 g (about 1 1/2 cup) coarse cornmeal
- 160 g (about 1 1/3 cup) all-purpose flour (may sub for 140 g (about 1 1/2 cups) Bob's Red Mill Paleo Baking Flour if gluten-free)**
- 2 tsp baking powder
- 1/2 tsp baking soda
- 1 tsp Kosher salt
Instructions
- Preheat oven to 375 degrees F / 190 C.
- Set a large cast-iron skillet over medium heat. Add butter and allow to melt, stirring with a wooden spoon occasionally.
- As the butter melts it will begin to foam. Watch the pan closely during this process as the color will quickly change from buttery yellow, to golden, to toasty brown.
- Once the butter has reached a stage where it is golden brown with some toasty dark brown bits, remove it from the stove immediately and carefully transfer to a large heatproof mixing bowl. *Because the cast-iron skillet you're working with is black, it is even more imperative that you watch closely as it will be more difficult to see this transition than if you were using a light-colored pan. Butter can transition from a lovely toasty brown to burned and black in a matter of seconds.
- Add the maple syrup to the butter mixture and whisk together, then add the buttermilk and whisk again.
- At this point, the mixture should be cool enough to add the eggs. You do not want to add them earlier as eggs hitting a hot bowl of butter are likely to scramble. Whisk the eggs in until evenly blended.
- Add the cornmeal, flour, baking powder, baking soda, and kosher salt and whisk to combine until evenly blended.
- Using a spatula, transfer the cornbread batter back into the hot cast iron pan and carefully transfer the pan to the oven.
- Bake for 30-35 minutes or until the top of cornbread begins to brown and a toothpick comes out clean. Allow to cool for 10 minutes before slicing and serving.
Notes
Nutritional information on Whip & Wander is provided as a courtesy and is approximate only. We cannot guarantee the accuracy of the nutritional information given for any recipe on this site.
1/19/22 This recipe was updated and may no longer fit specified dietary preferences from previous versions of this post.
*If you don't have any buttermilk on hand, you can swap out the buttermilk for an equal portion of whole milk + 1 tbsp white vinegar or apple cider vinegar. If you are sensitive to the lactose in buttermilk and need an alternative, you can swap the buttermilk out for an equivalent amount of lactose-free milk or coconut milk. For best results, portion out your milk and add the vinegar directly to the milk to sour for 5 minutes before making the batter.
**If you need to substitute the traditional all-purpose flour for a gluten-free alternative, Bob's Red Mill Paleo Baking Flour works well. The flour blend performs differently, so you'll want to note the measurement change when making this swap. You'll need 140 g (about 1 1/2 cups) of this gluten-free flour blend to replace the 160 g (about 1 1/3 cups) all-purpose flour. I have not tried this recipe with other gluten-free blends, so I can't comment on how well they will perform.
*** It's important that your maple syrup and buttermilk are room temperature before adding. If the cold maple syrup or buttermilk hits the hot butter, it will create clumpy butter solids instead of a smooth batter. You'll also want to ensure that the butter mixture is cool enough before adding the room-temperature eggs so that they don't scramble.
Nutrition
- Serving Size: 1 slice
- Calories: 418
- Sugar: 16 g
- Sodium: 374 mg
- Fat: 20 g
- Saturated Fat: 13 g
- Carbohydrates: 49 g
- Fiber: 4 g
- Protein: 9 g
- Cholesterol: 119 mg