
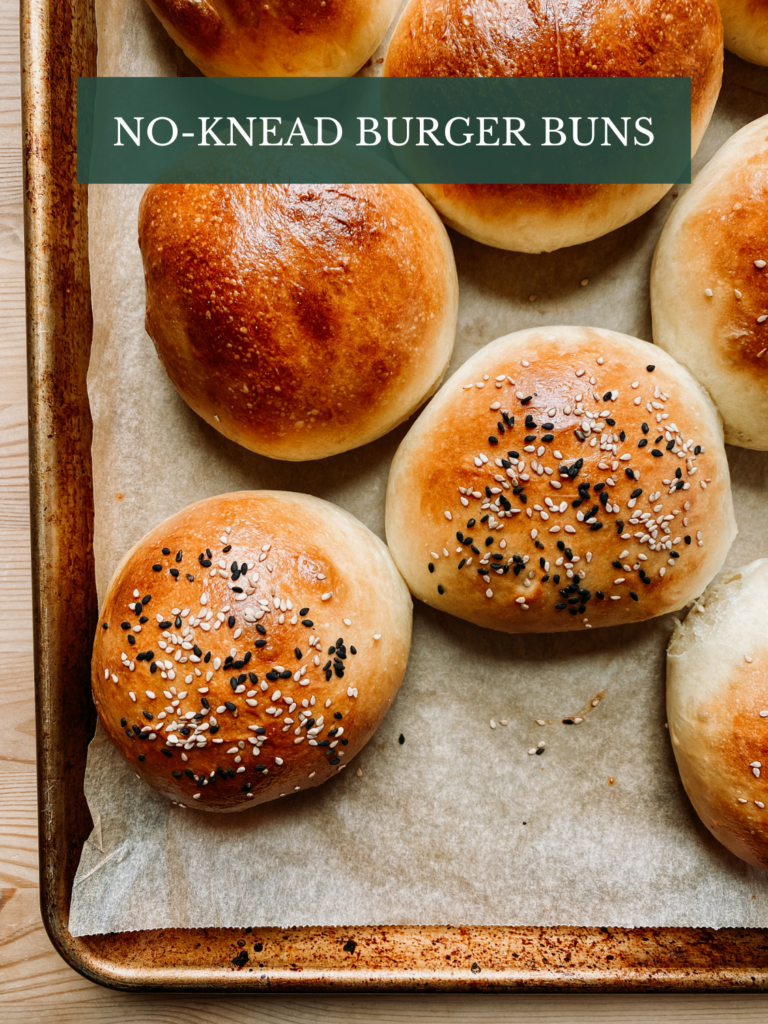

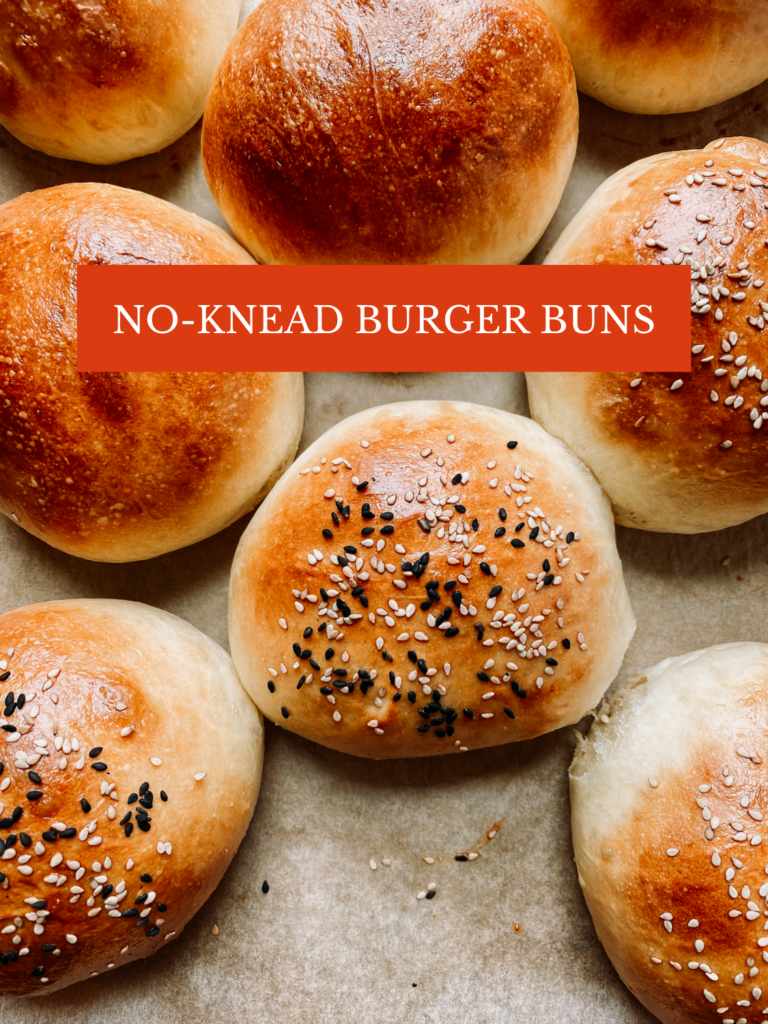
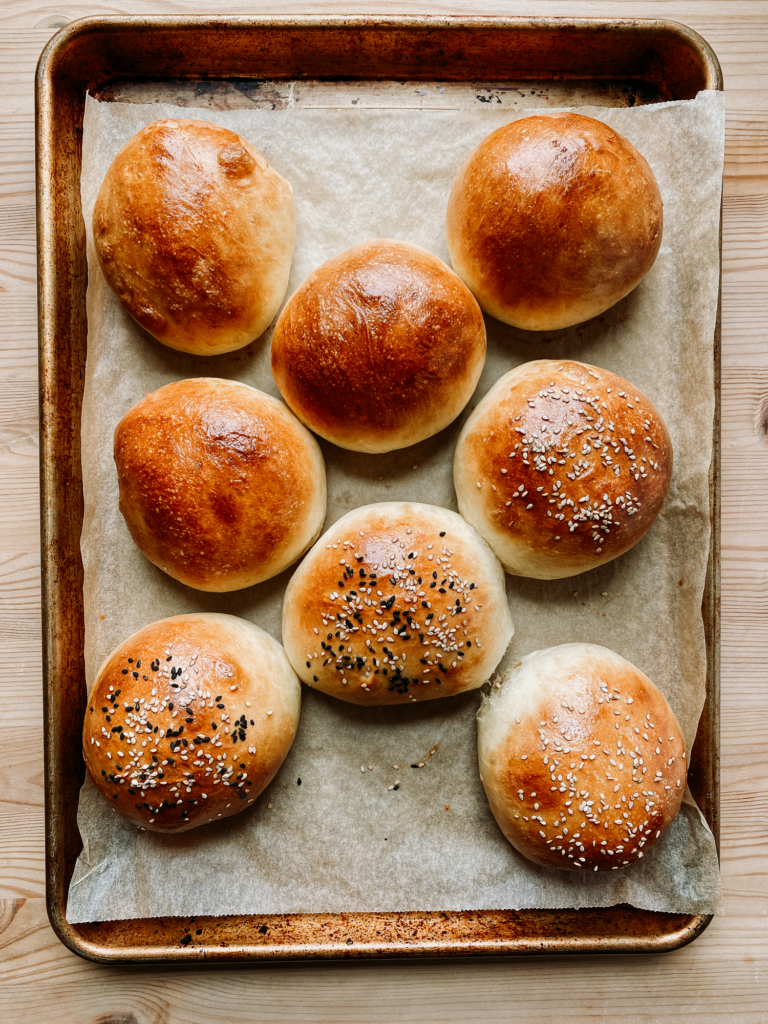
These No-Knead Classic Burger Buns are super simple to make with pantry staples. They come together with limited effort, no kneading (just a series of folds), and are a delicious base for both burgers and sandwiches!

Jump to:
Ingredients needed
- All-Purpose Flour - I prefer to use organic unbleached all-purpose flour for these No-Knead Classic Burger Buns. The three that show up in my pantry most often are: Central Milling Organic Unbleached, King Arthur Organic Unbleached, and Bob's Red Mill Organic Unbleached.
- Dry milk powder - Adding dry milk powder has multiple benefits. It adds flavor to the dough, helps tenderize it resulting in a softer bread, and also contributes to overall browning. I generally use Bob's Red Mill Non-Fat Dry Milk Powder.
- Yeast - SAF Instant Yeast Red Label is my preferred yeast though you can feel free to use any instant dry yeast you prefer. If you prefer to use an active dry yeast instead of instant yeast, you'll need to let the yeast bloom first before incorporating it with the flour, and your dough rise time is likely to increase.
- Olive oil - The fat in olive oil will not only help flavor the dough, but helps improve texture by tenderizing gluten and producing a more tender crumb and golden crust.
- Sugar - White granulated sugar helps boost the yeast, contributes to the overall flavor of the bread, improves the texture by tenderizing gluten strands, and helps lock in moisture in the bread crumb which keeps the bread fresher for longer.
- Kosher salt - Diamond Crystal is what I use in my kitchen.
- Water - Lukewarm water is best, between 105-110 degrees F / 40-43 degrees C.


How to make no-knead classic burger buns
- In a large mixing bowl, combine sugar, yeast, and lukewarm water. If you're using instant yeast (as I prefer) you do not technically need to wait for the yeast to bloom, but I always do (just in case); this will take about 2-5 minutes. If you use active dry yeast you must wait for the yeast to bloom before proceeding.
- Whisk in olive oil and Kosher salt. Then add the flour and milk powder and combine until you have a shaggy dough. I like to use a Danish dough whisk for this but you can also use a sturdy wooden spoon. Cover with a towel to rest for 10 minutes.
- Uncover the bowl and using a wetted hand, grab a corner of the dough and fold it up and over toward the center of the dough. Continue working around the perimeter of the dough until you have folded the dough onto itself 12 times total. Cover with a towel and rest for another 10 minutes.
- Repeat 12 folds (second set).
- Cover with a towel and rest for a further 10 minutes.
- Repeat 12 folds (third set).
- Transfer the dough to a large clean mixing bowl rubbed with a thin layer of olive oil (or wash and reuse the first bowl). Cover the bowl with a towel and allow to rest in a warm area for 2 hours.
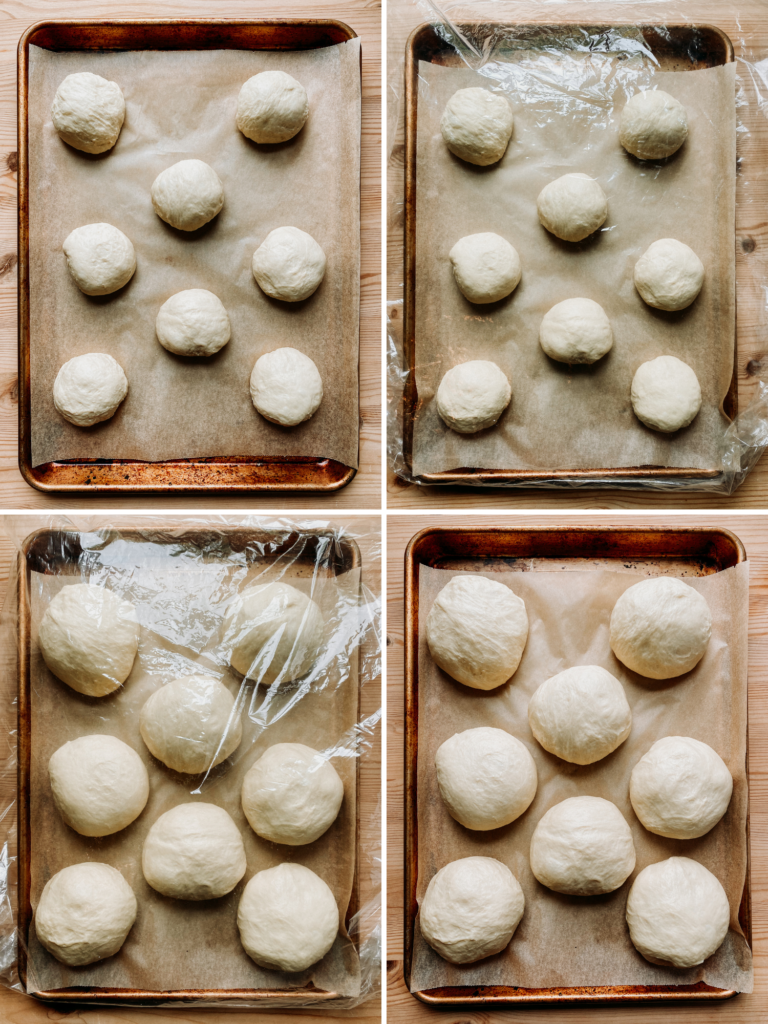
- Once risen, punch the dough down to release the air from the first rise. Transfer the dough to a clean surface and divide into 8-10 sections, depending on how large you would like your buns to be. Shape each dough portion into a bun, pinching the underside of each to close.
- Transfer each bun to a baking sheet lined with parchment paper for its second rise. I prefer to cover the sheet pan of buns with a bakers proofing bag, which I tent over the buns so that it's not touching them and tuck the open end closed on the underside of the pan. Alternatively, you can cover the buns in a clean warm and lightly damp cloth or a lightly oiled layer of plastic wrap. Allow to rise for 45 - 60 minutes or until the buns have nearly doubled in size.
- Atleast 30-minutes before you plan to bake the buns, preheat the oven to 425 degrees F / 220 degrees C.
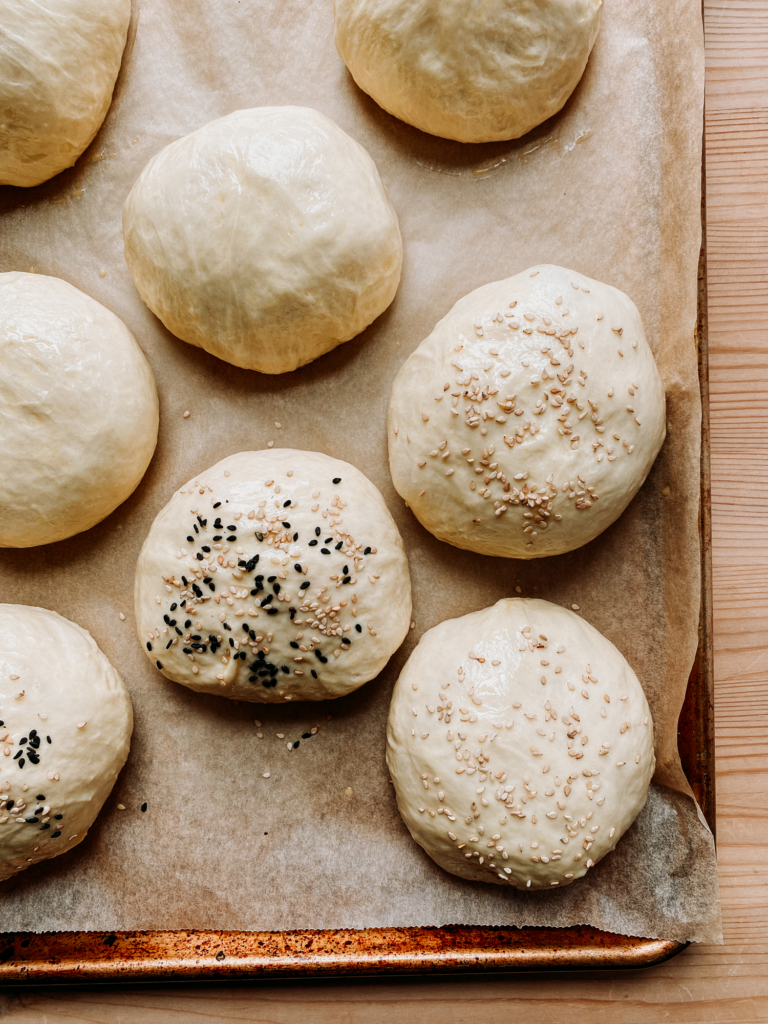
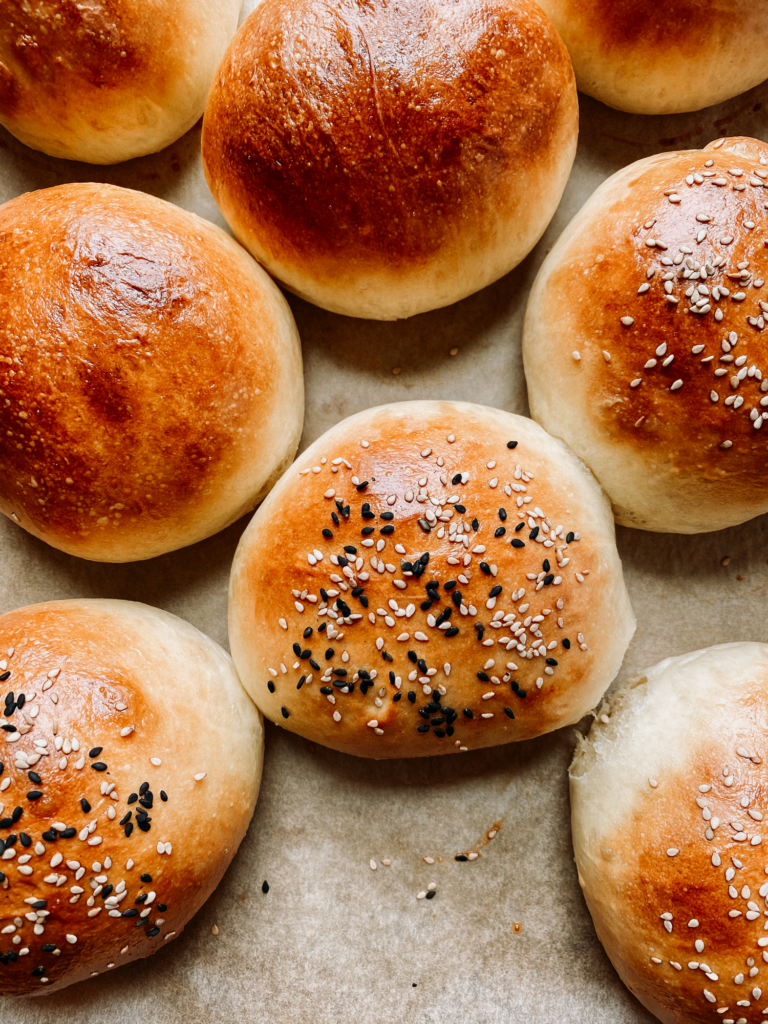
- Using a basting brush, brush each bun with egg wash then sprinkle with sesame seeds or poppy seeds, if desired.
- Bake for 10-15 minutes, depending on size, until the buns are lightly golden.


Tips for making the best burger buns
Use a kitchen scale to measure
Measuring cups are not an accurate way to measure dry ingredients. Even if you utilize best practices for measuring dry ingredients by spooning and leveling, you're likely to end up with slightly different measurements every time. I have included a rough estimate of ingredients measured with measuring cups in the recipe below, but the most accurate way to achieve consistently good results every time is to measure your dry ingredients with a kitchen scale. Thankfully, measuring dry ingredients with a kitchen scale is not only more accurate, its much easier -- and you have the added bonus of less dishes to wash afterwards!
Use quality flour
I always use unbleached flour in all of my baked goods, including these No-Knead Classic Burger Buns. Not only, does unbleached flour yield a better flavor than bleached it also provides more structure for baked goods. When possible, I like to use organic flour, but I find that an unbleached flour is more important to the overall flavor and texture of the baked good. My preferred flour for these burger buns is all-purpose, but you can use bread flour if you prefer a chewier bun.
The three all-purpose flours that show up in my pantry most often are: Central Milling Organic Unbleached, King Arthur Organic Unbleached, and Bob's Red Mill Organic Unbleached.
Wash your buns
For a softer, more evenly golden crust and a nice glossy appearance you'll want to brush your buns with a thin coating of egg or dairy wash. I prefer to use a whole egg wash with a splash of water for my burgers buns, but you can also wash your buns with egg yolk, egg white, milk, cream. If you do not wash your burger buns, they are more likely to render a harder crust that dries out more quickly.
Add seeds to the top
I love adding a sprinkle of white or black sesame seeds or poppy seeds to the top of my No-Knead Classic Burger Buns for added texture, though you can also leave your buns bare of seeds if preferred. These will secure in place best if added after an egg wash.

What to pair with these burger buns
These No-Knead Classic Burger Buns are fantastic for burgers and sandwiches of all kinds. Some of my favorite recipes that pair well with them are:
- Mediterranean Turkey Burgers
- French Chicken Salad
- Sloppy Joes (in a bun instead of a bowl)
- Crispy Oven Fried Fish with Lemon Herb Tartar Sauce
- Pulled chicken or pork tossed in Carolina Gold Mustard BBQ Sauce, Spicy Red BBQ Sauce, Chipotle Peach BBQ Sauce, or Ogden's Old Firewhisky BBQ Sauce -- and don't forget to top your bbq sandwich with Spicy Cabbage Slaw!
How to store these burger buns
These No-Knead Burger Buns will keep in an air-tight container or storage bag for around 4 days.
What tools do I need to make this recipe?
- A baker's half sheet lined with parchment paper
- A kitchen scale
- Liquid measuring cups
- Measuring spoons
- A large mixing bowl
- A sturdy wooden spoon - OR - a Danish dough whisk (nice to have not not essential)
- A clean kitchen towel
- A baker's proofing bag (nice to have but not essential)
- A bench scraper (nice to have but not essential)
- A small bowl (to mix the egg wash)
- A fork
- A basting brush
Are you looking to upgrade your cooking tools or replenish your pantry? Check out my kitchen tools shop page and pantry staples shop page to find my must-have kitchen tools, pantry items, and other Whip & Wander favorites.

Looking for more baking inspiration?
Love these No-Knead Classic Burger Buns? Here are some more of my favorite bread recipes:
Print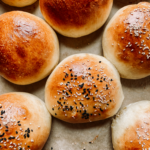
No-Knead Classic Burger Buns
- Prep Time: 15 minutes
- Rest time: 3 hours 15 minutes
- Cook Time: 10 minutes
- Total Time: 3 hours 40 minutes
- Yield: 8 servings 1x
- Category: Breads
- Method: Oven
- Cuisine: American
- Diet: Vegetarian
Description
These No-Knead Classic Burger Buns are super simple to make with pantry staples. They come together with limited effort, no kneading, and are a delicious base for both burgers and sandwiches!
Ingredients
- 1 tbsp granulated white sugar
- 2 tsp instant yeast (I prefer SAF red label)*
- 300 g (about 1 ¼ cup) lukewarm water (about 105-110 degrees)
- 50 g (about ¼ cup) olive oil, plus additional to coat the bowl
- 2 tsp Kosher salt
- 500 g (about 4 cups + 2 ½ tbsp) all-purpose flour
- 32 g ( about ¼ cup) non-fat dry milk powder
- Egg wash: 1 large egg + 2 teaspoon water, whisked
- Optional: sesame seeds and/or poppy seeds to top
Instructions
- In a large mixing bowl, combine sugar, yeast, and lukewarm water. If you're using instant yeast (as I prefer) you do not technically need to wait for the yeast to bloom, but I always do (just in case); this will take about 2-5 minutes. If you use active dry yeast you must wait for the yeast to bloom before proceeding.
- Whisk in olive oil and Kosher salt. Then add the flour and milk powder and combine until you have a shaggy dough. I like to use a Danish dough whisk for this but you can also use a sturdy wooden spoon. Cover with a towel to rest for 10 minutes.
- Uncover the bowl and using a wetted hand, grab a corner of the dough and fold it up and over toward the center of the dough. Continue working around the perimeter of the dough until you have folded the dough onto itself 12 times total. Cover with a towel and rest for another 10 minutes.
- Repeat 12 folds (second set).
- Cover with a towel and rest for a further 10 minutes.
- Repeat 12 folds (third set).
- Transfer the dough to a large clean mixing bowl rubbed with a thin layer of olive oil (or wash and reuse the first bowl). Cover the bowl with a towel and allow to rest in a warm area for 2 hours.
- Once risen, punch the dough down to release the air from the first rise. Transfer the dough to a clean surface and divide into 8-10 sections, depending on how large you would like your buns to be. Shape each dough portion into a bun, pinching the underside of each to close.
- Transfer each bun to a baking sheet lined with parchment paper for its second rise. I prefer to cover the sheet pan of buns with a bakers proofing bag, which I tent over the buns so that it's not touching them and tuck the open end closed on the underside of the pan. Alternatively, you can cover the buns in a clean warm and lightly damp cloth or a lightly oiled layer of plastic wrap. Allow to rise for 45 - 60 minutes or until the buns have nearly doubled in size.
- Atleast 30-minutes before you plan to bake the buns, preheat the oven to 425 degrees F / 220 degrees C.
- Using a basting brush, brush each bun with egg wash then sprinkle with sesame seeds or poppy seeds, if desired.
- Bake for 10-15 minutes, depending on size, until the buns are lightly golden.
Notes
Nutritional information on Whip & Wander is provided as a courtesy and is approximate only. We cannot guarantee the accuracy of the nutritional information given for any recipe on this site.
* If you prefer to use an active dry yeast instead of instant yeast, you'll need to let the yeast bloom first before incorporating it with the flour and your dough rise time is likely to increase.
These No-Knead Burger Buns will keep in an air-tight container or storage bag for around 4 days.
Nutrition
- Serving Size: 1 burger bun
- Calories: 314
- Sugar: 6 g
- Sodium: 357 mg
- Fat: 7 g
- Saturated Fat: 1 g
- Carbohydrates: 50 g
- Fiber: 2 g
- Protein: 10 g
- Cholesterol: 13 mg
Rhonda says
I finally made these buns for hamburgers tonight for dinner with my husband and adult children. They were a big hit!
Megan Aldrich says
This is now my Go-To recipe for hamburger and hot dog buns. It’s so easy and they are always so good!
Jenni says
Megan, I'm go glad you enjoy this recipe! It's our favorite burger bun recipe, and it's so adaptable in other forms. Thank you!
Julie says
This is the second time making hamburger buns, first time with this recipe. I loved them, so delicious. I find the stretch and fold technique makes my breads taste better. I substituted some milk for the milk powder; didn't have any on hand. I made 8 buns, will make 9-10 next time, better size for my 5 1/4 oz burgers. Makes great sandwich buns as well! Keeper!
Jenni says
Julie, I'm so glad you enjoy this recipe. It's such a flexible dough for burgers and sandwiches!
Jacob says
Love the buns. Using this recipe to make a loaf of bread
Jenni says
Jacob, I'm so glad you enjoy these buns. I hope you had good results with a loaf of bread!
Sarah | Well and Full says
These look so fluffy and appetizing! I’ve got to try them!