

A sweet maple update to a classic
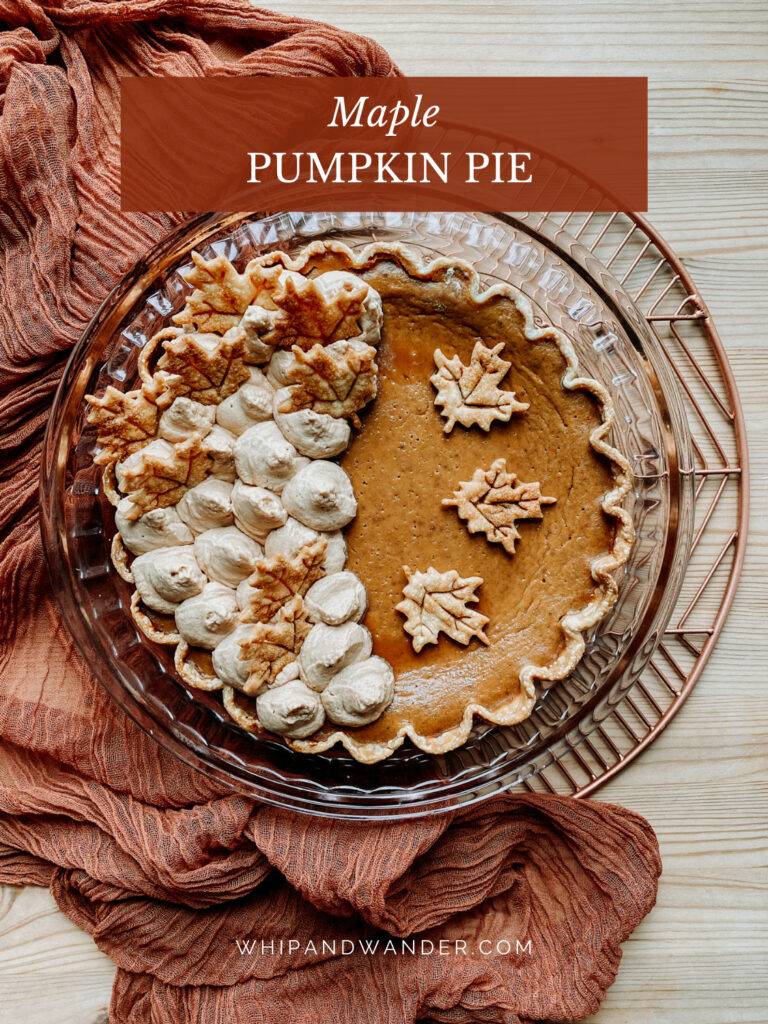
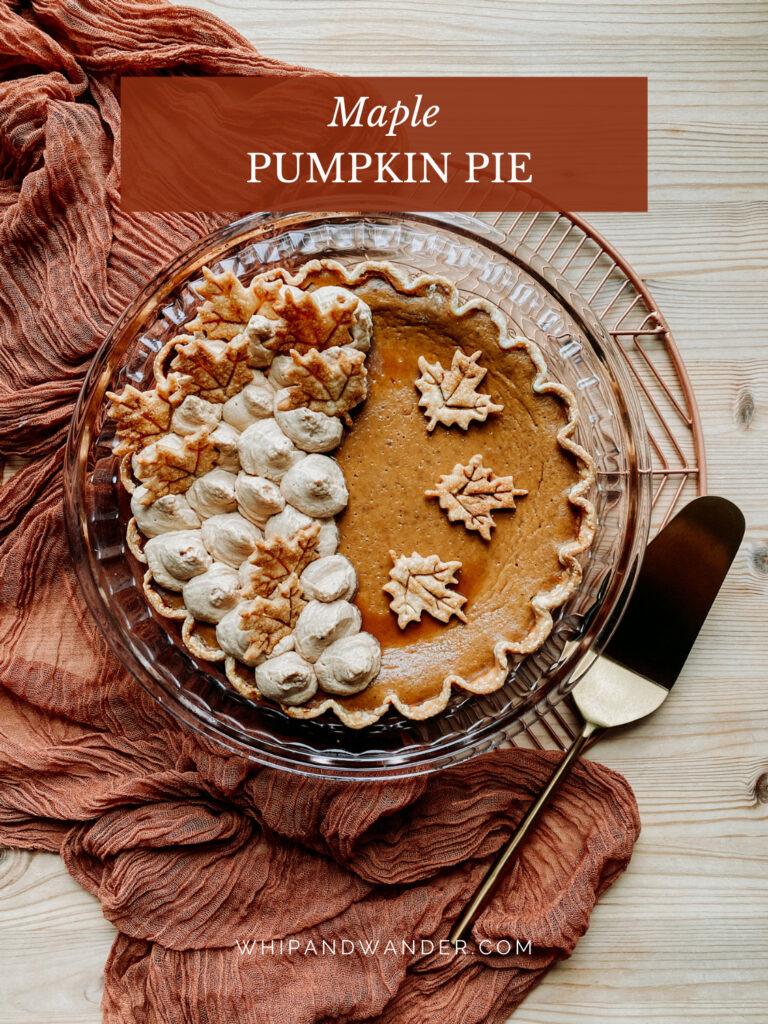
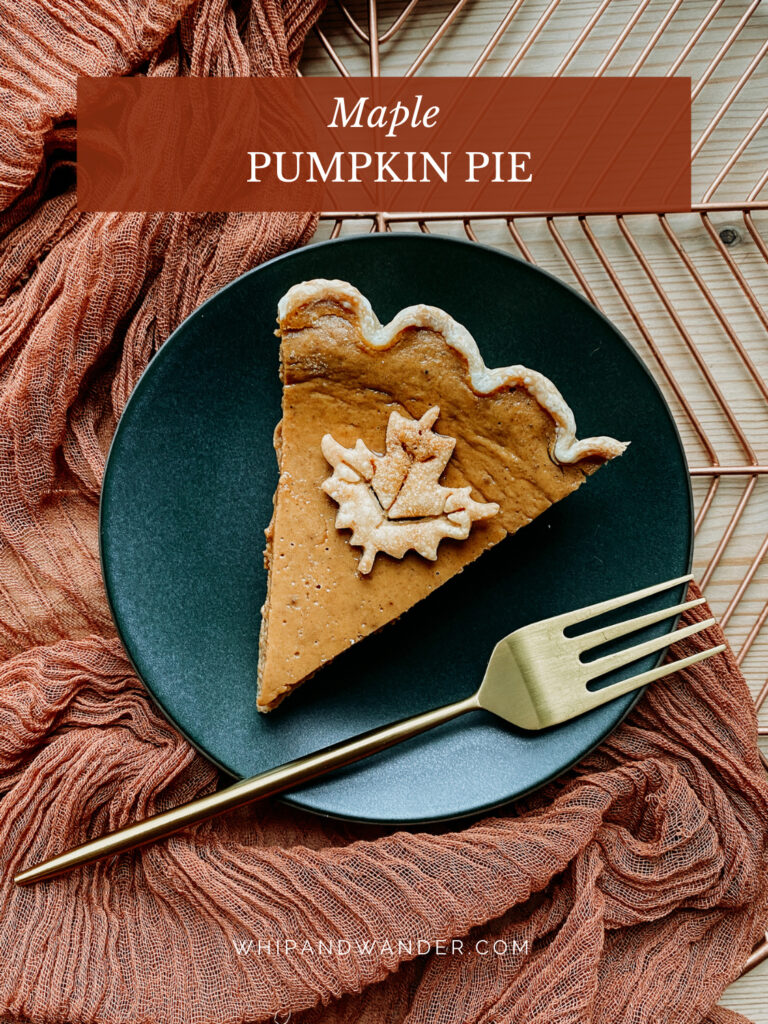
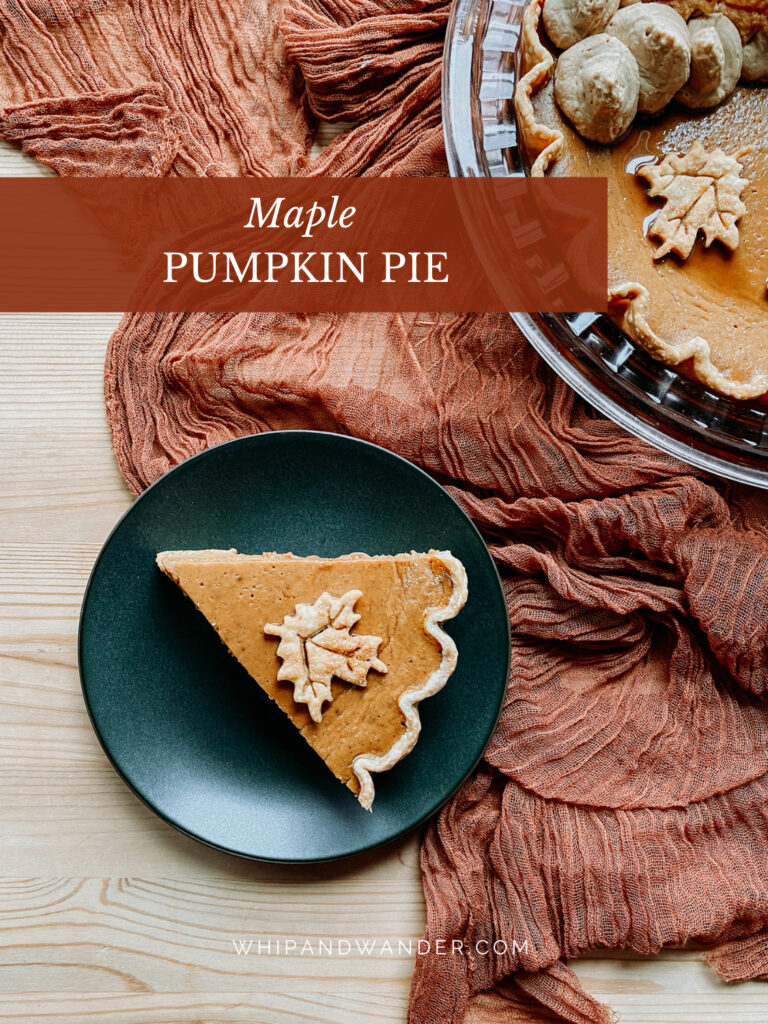
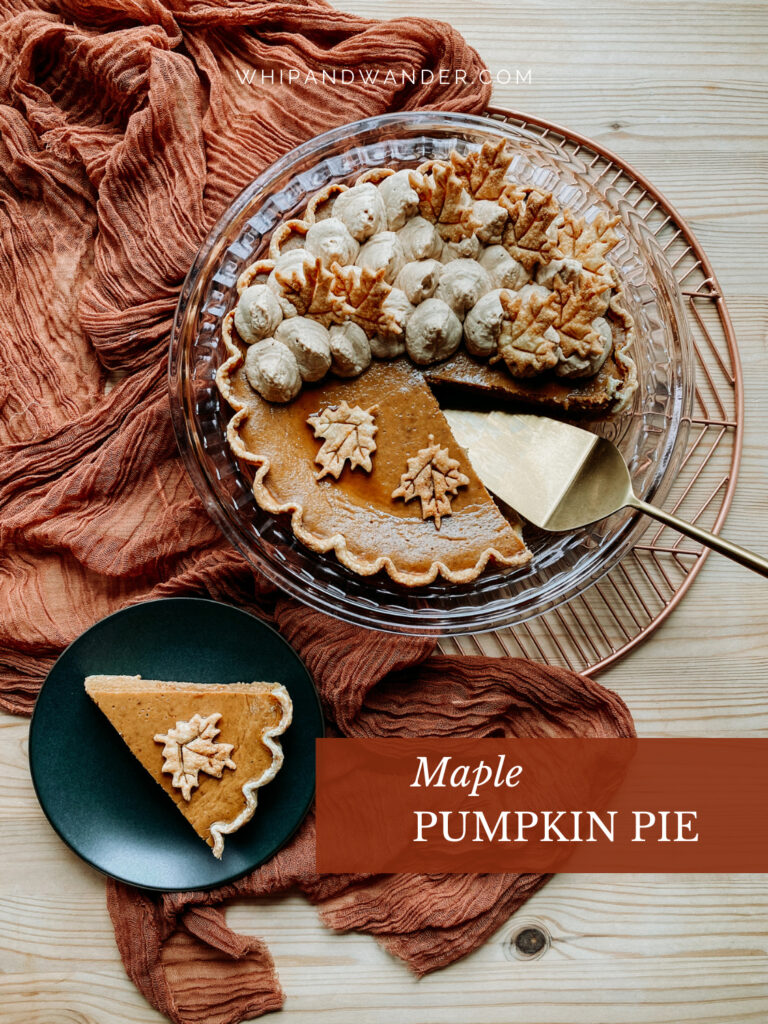
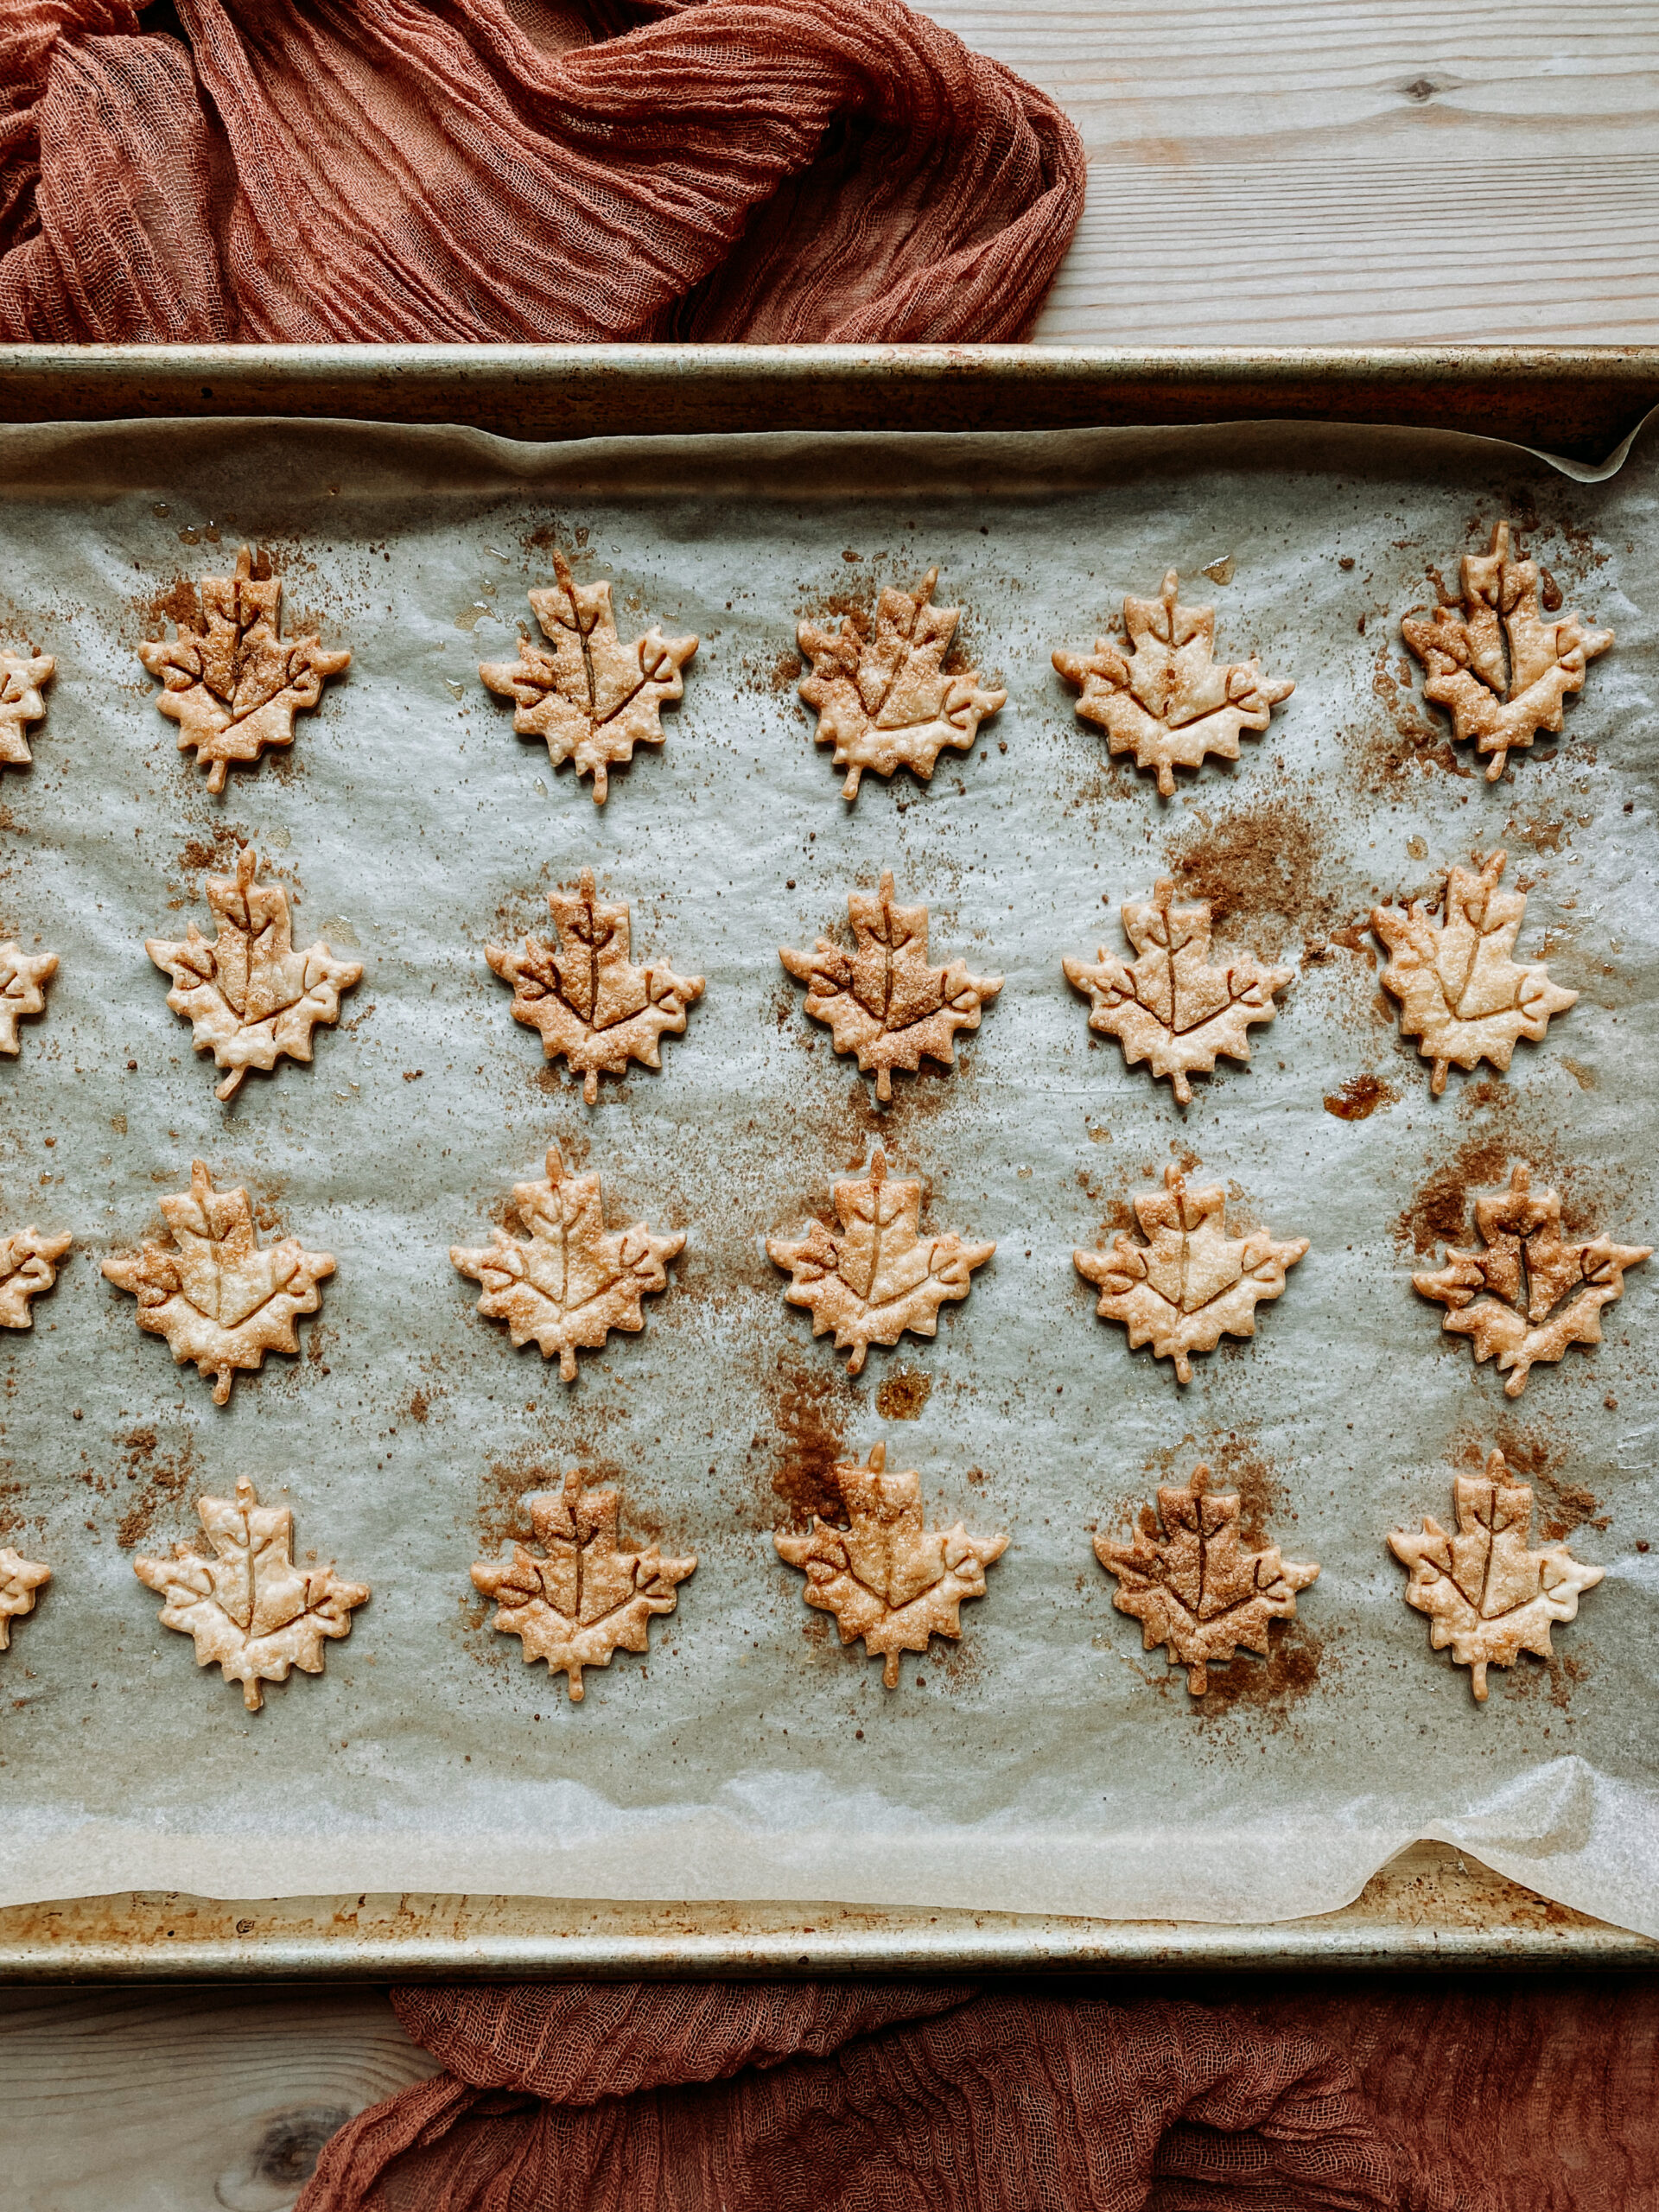
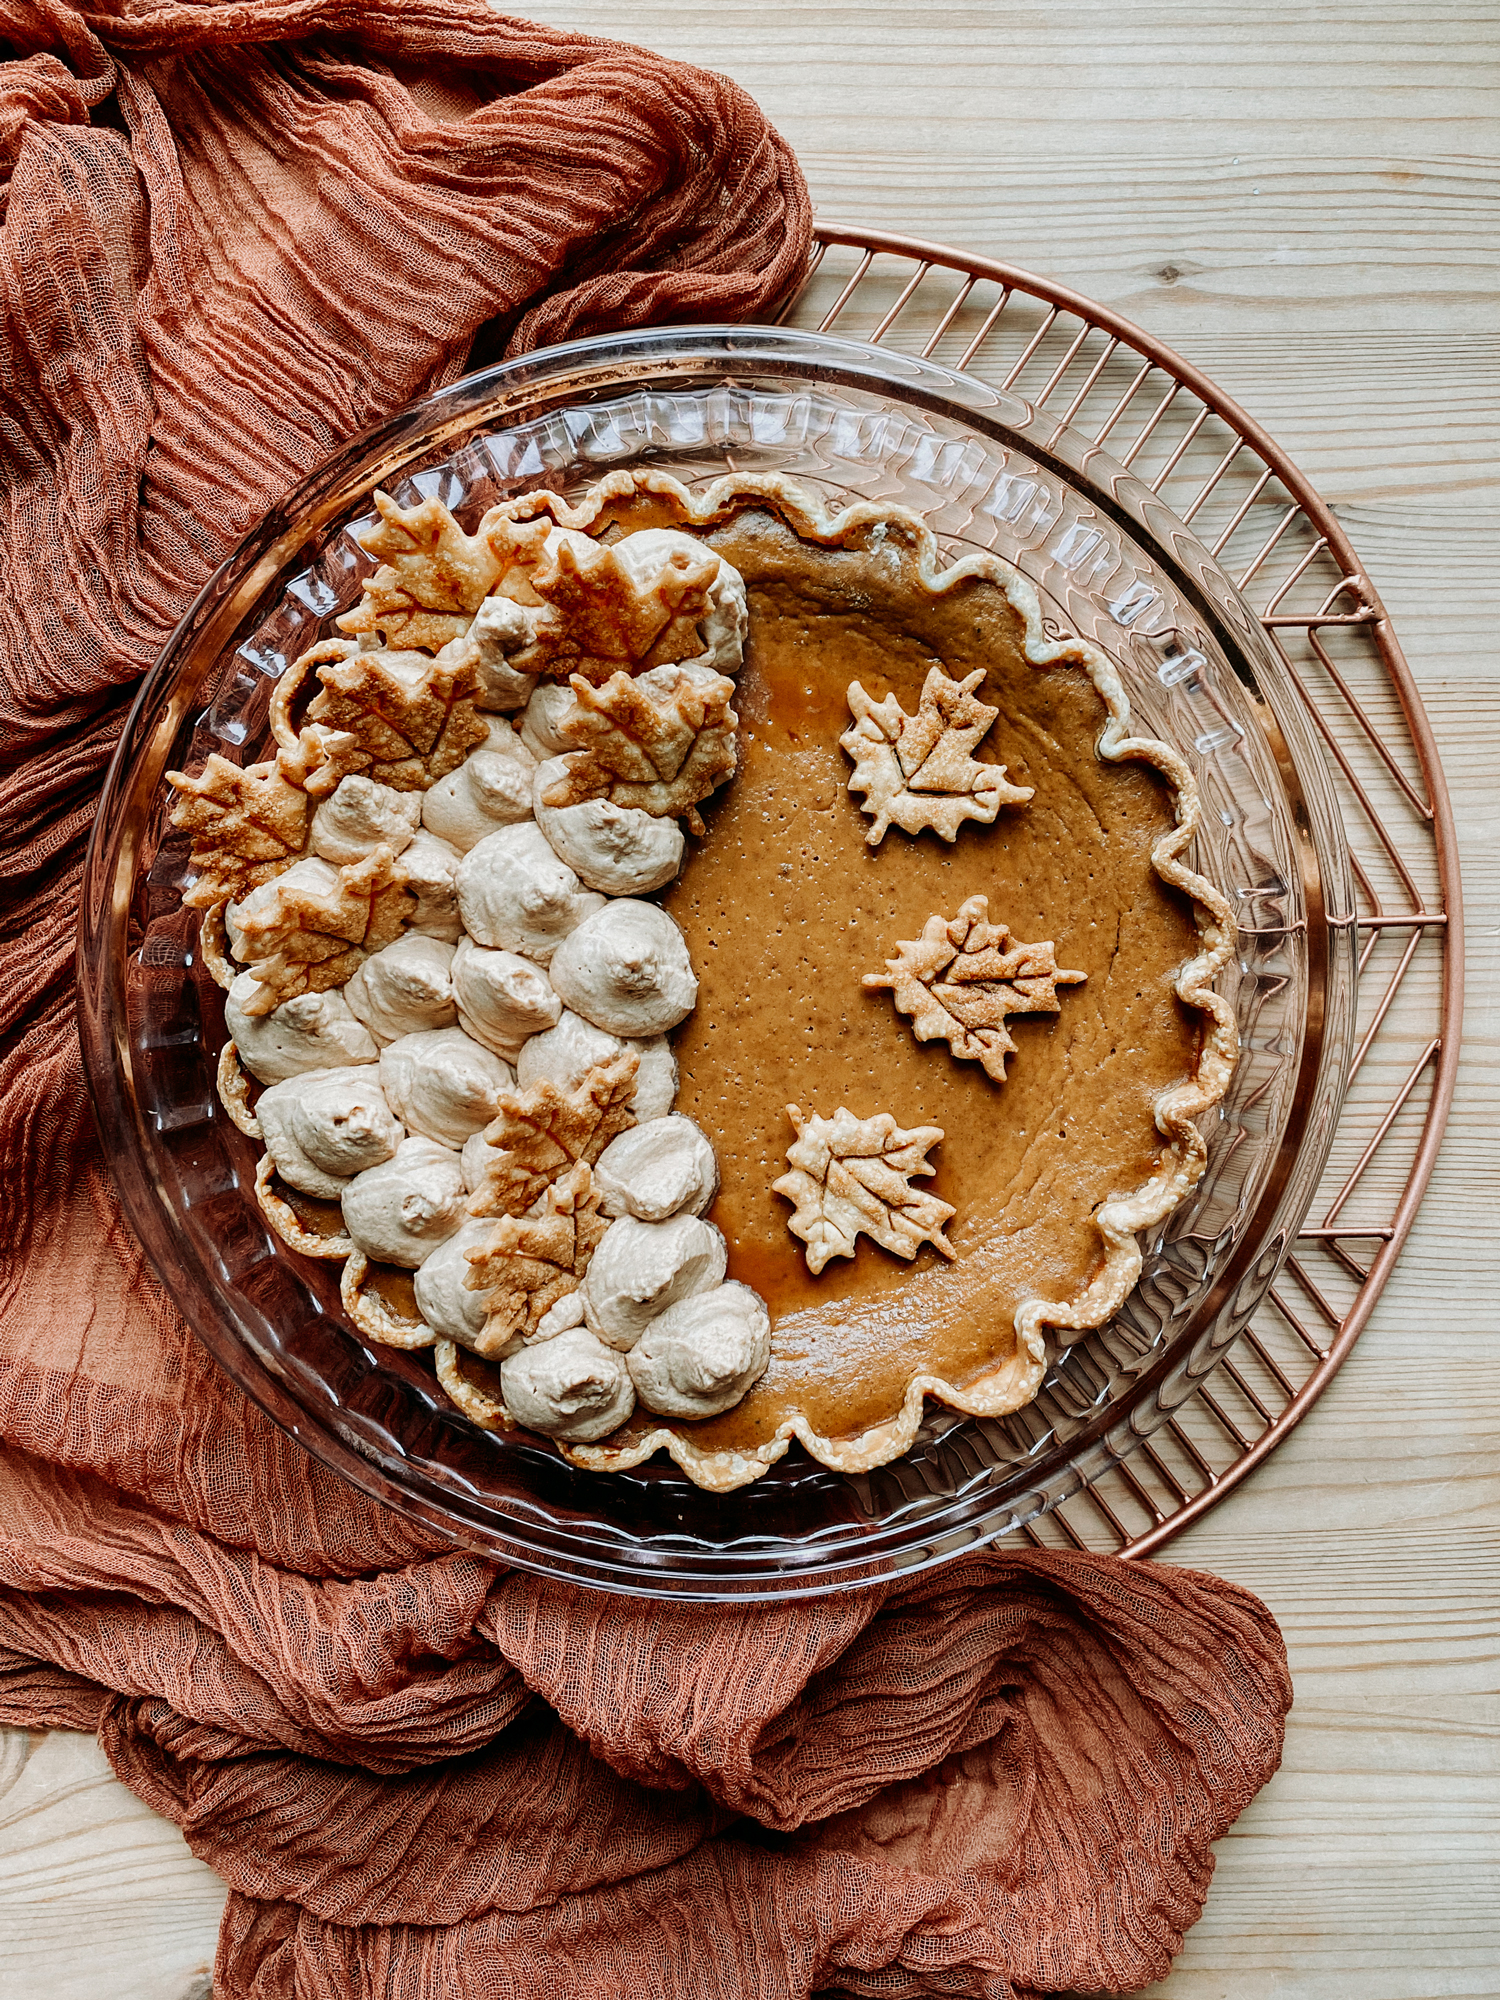
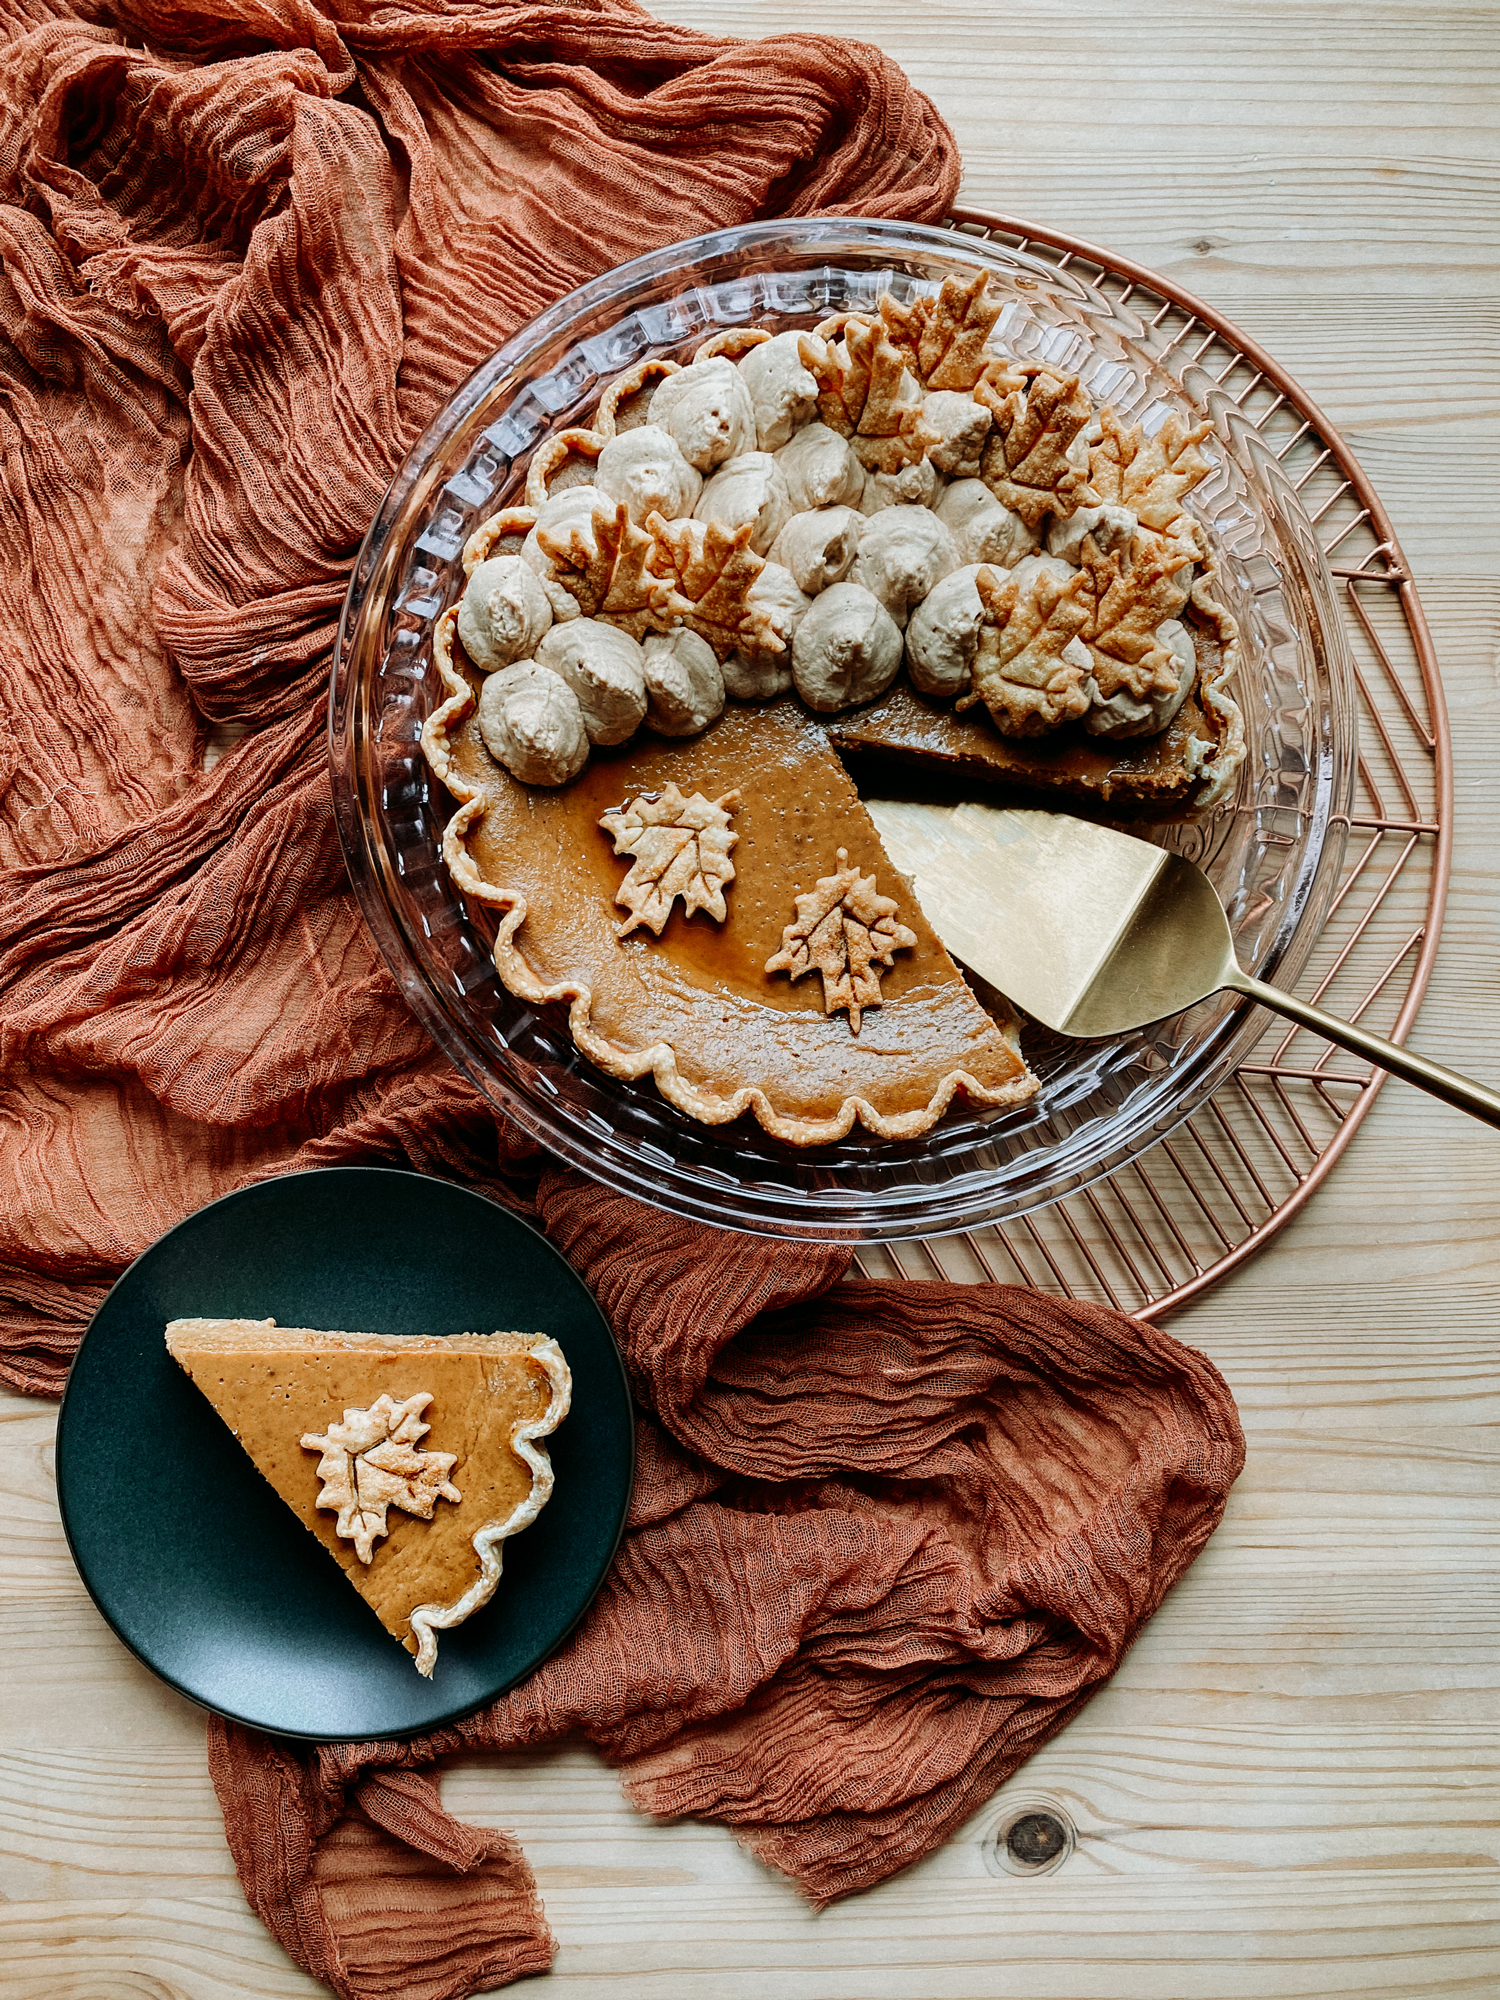
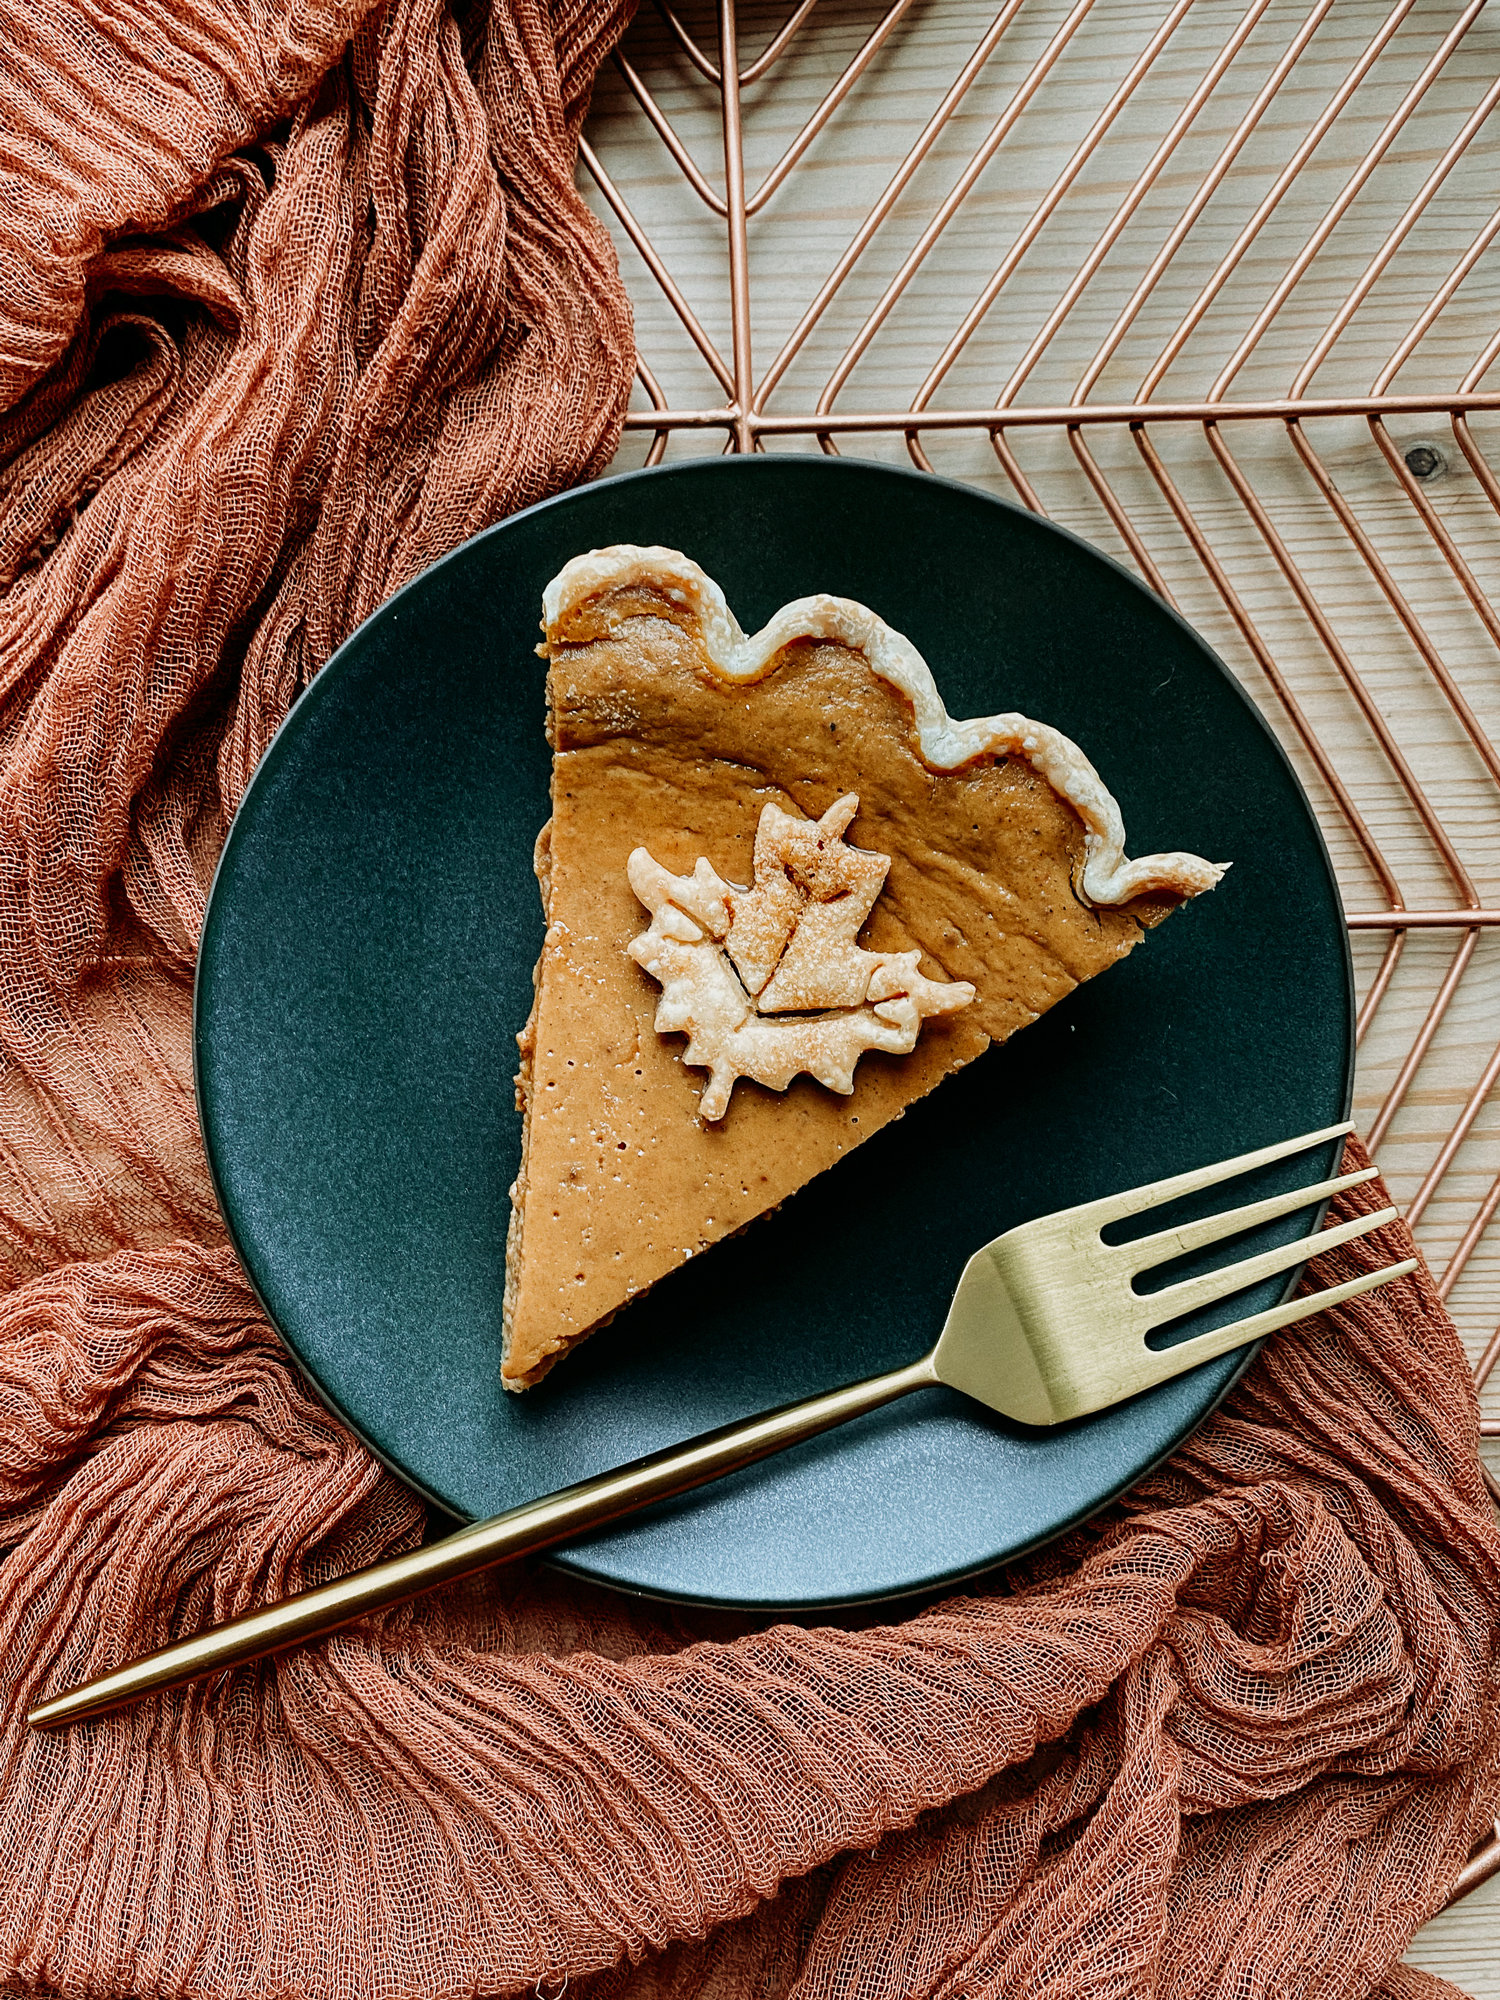
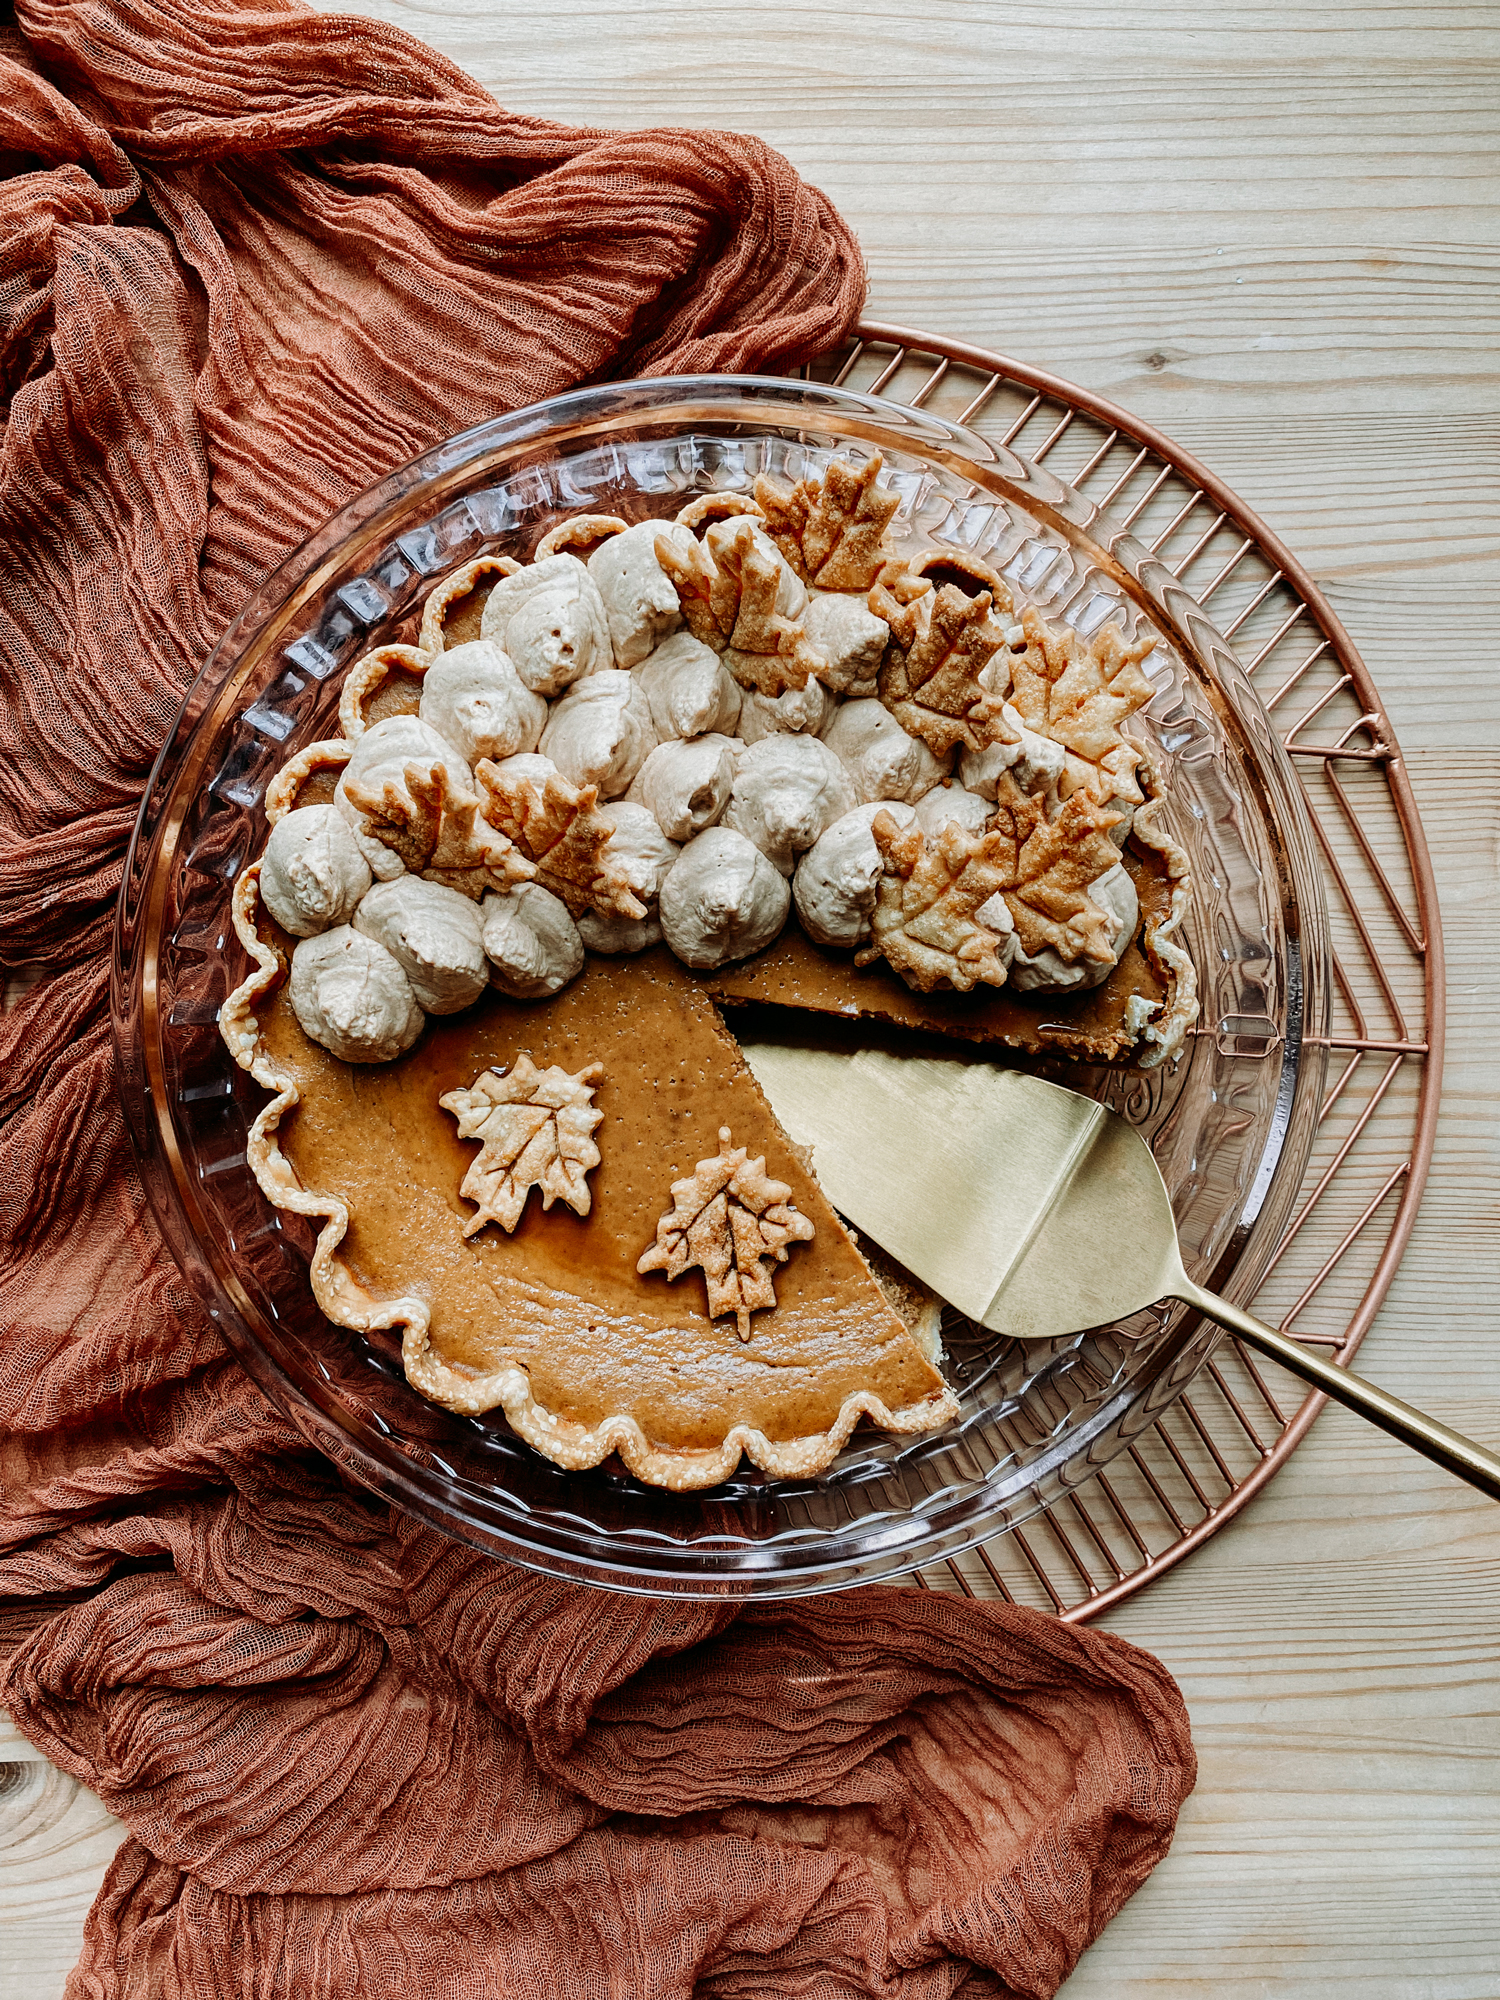
Pumpkin Pie has always been my favorite type of pie so I'm always thrilled to serve this Maple Pumpkin Pie during the holidays. The pumpkin filling is sweetened with pure maple syrup and imbued with vanilla and warm spices, including cinnamon, nutmeg, ginger, and cloves. I love to serve this updated version of classic pumpkin pie with maple sugar-dusted pie crust leaves and a big dollop of maple-toasted whipped cream.
Should I par-bake my pie crust?
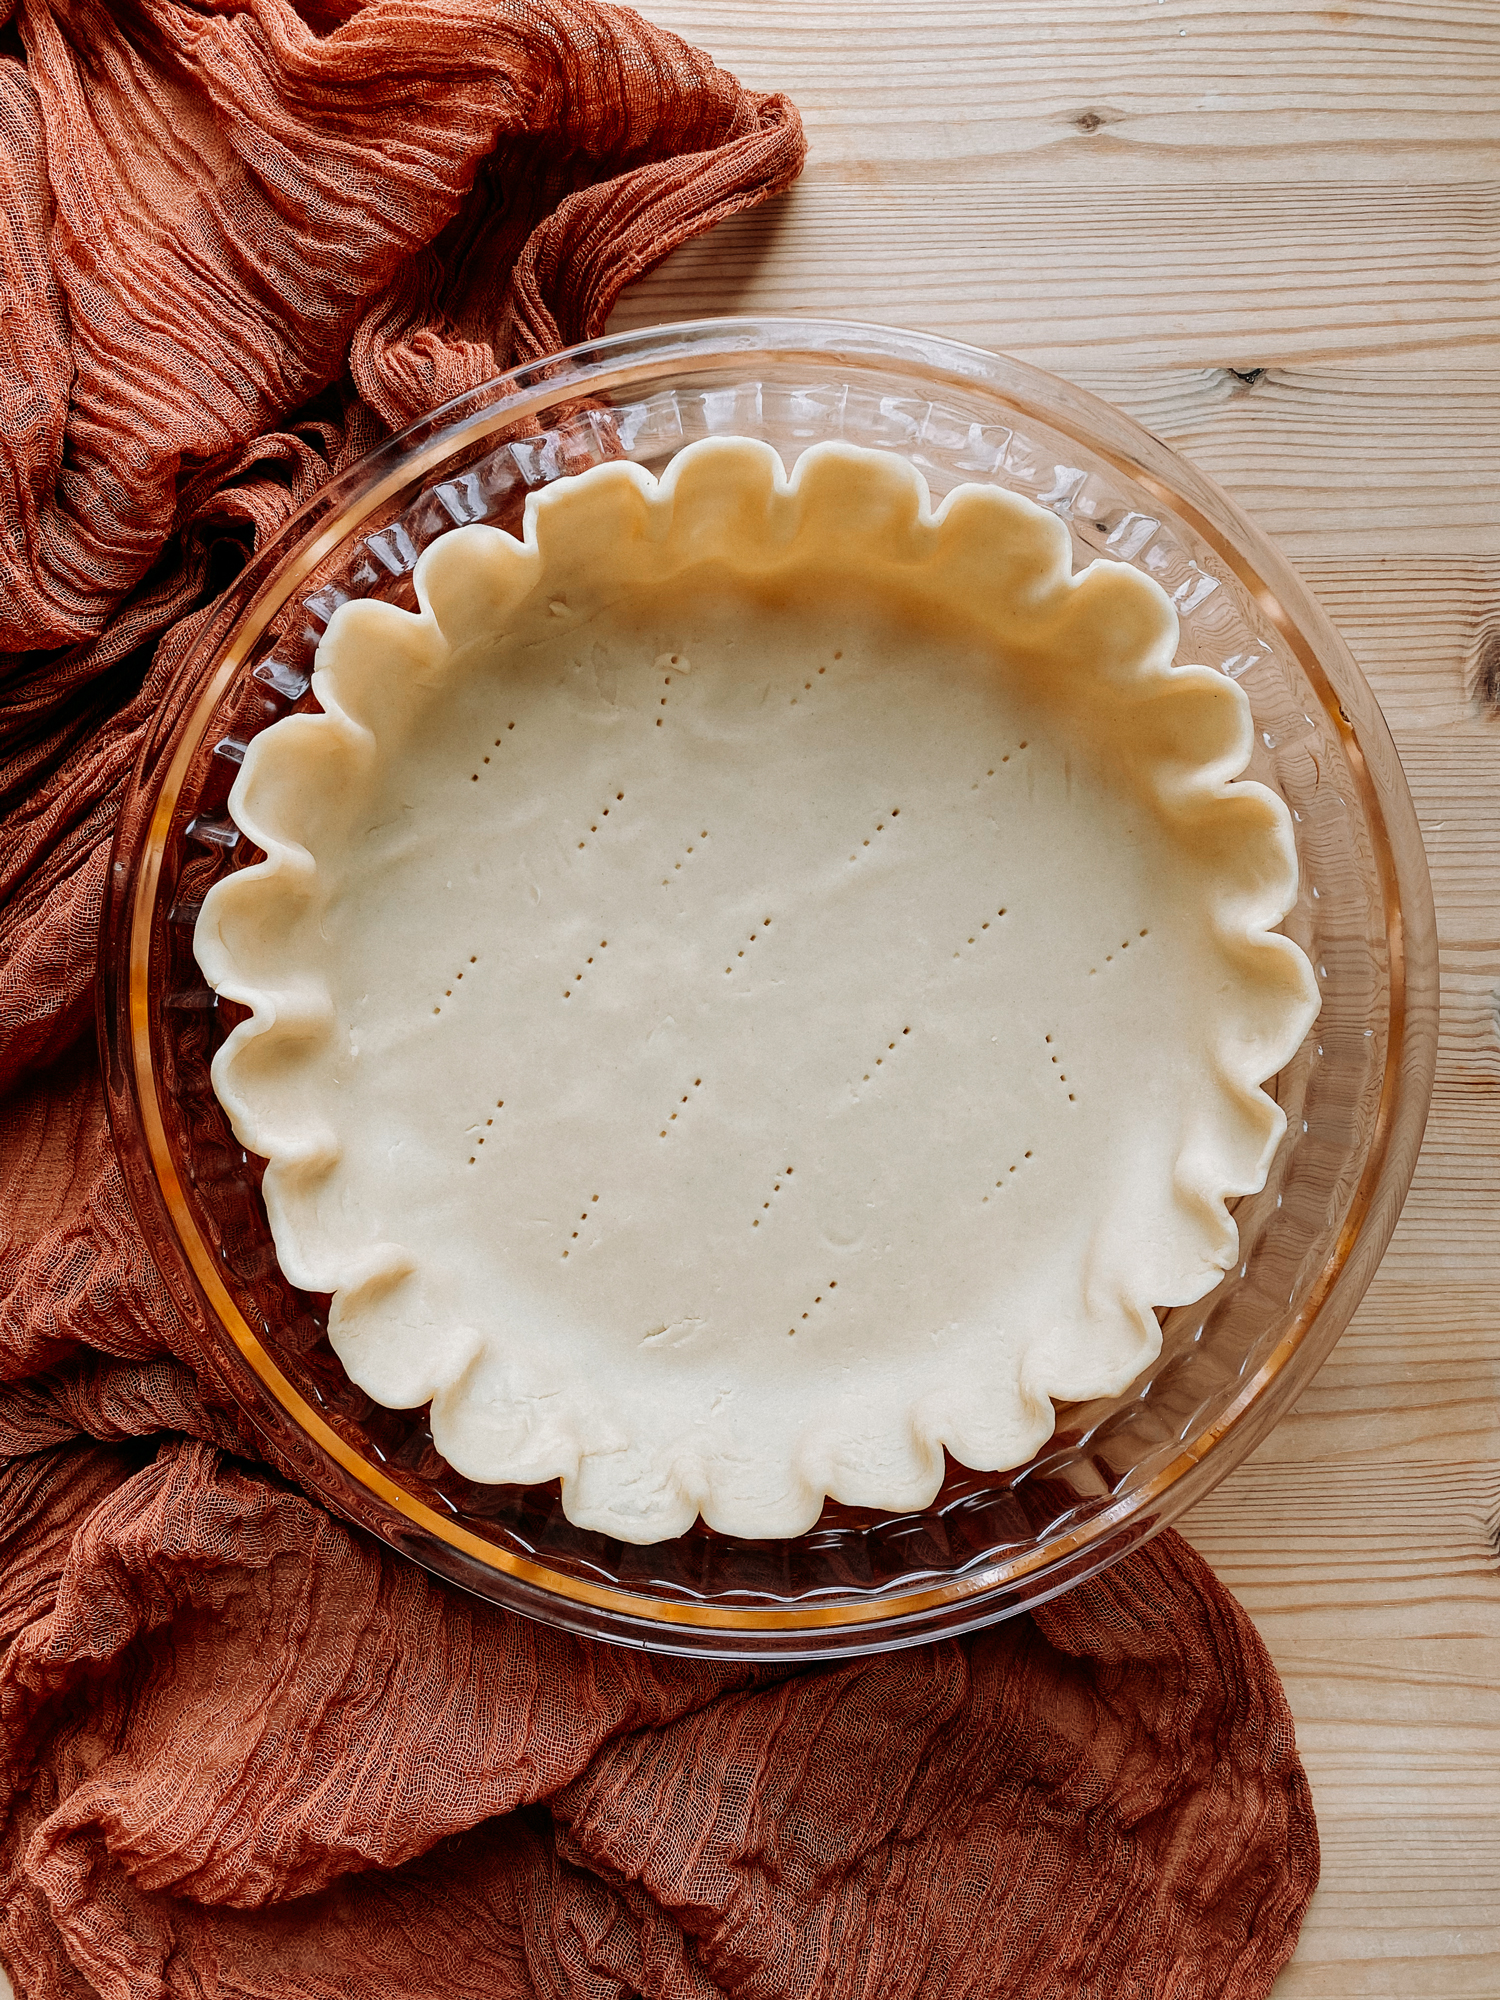
That is completely up to you. If I'm honest, I don't usually par-bake my pumpkin pie crust because I enjoy the slightly chewy texture of the bottom of the crust as it cooks with a custard base. However, if you want a nice, crispy crust all around, you'll want to par-bake, or partially blind-bake the crust first before adding the pumpkin filling.
How to par-bake / partially blind bake pie crust:
- After rolling the chilled pie dough and fitting it into the pan (don't forget to crimp the edges!), dock the bottom of the pie crust with a fork. If your crust has softened slightly is no longer chill at this point place it back in the fridge for 20-minutes to chill first for best results.
- Once it's ready to par-bake, line the pie crust with a piece of parchment paper and fill with dried beans or pie weights.
- Bake at 425 degrees F / 220 C for 12-15 minutes (for most crusts) or until the crust looks dry and is just starting to turn lightly golden. Carefully remove the pie weights and the parchment paper. Allow crust to cool slightly while you prepare the pumpkin pie filling. If you find that your pie crust starts browning too quickly once it is returned to the oven, you can cover the edges with tin-foil or these silicone pie crust covers to help prevent over-browning.
How to prevent your pumpkin pie from cracking
I personally don't find anything wrong with a cracked pumpkin pie top. After all, that's what whipped cream is for! However, there are two main things you can do to prevent your pumpkin pie from cracking if that is your goal:
Don't overbake
This is always a hard one for me because I like my pumpkin pie to be a little more on the firm side and often distrust the wet jiggly center that I see when I pull pumpkin pie out of the oven. Inevitably, when I do add extra time to my pumpkin pie bake to firm the custard up and decrease the size of the jiggly center, it almost always results in a crack or two. However, a properly-baked pumpkin pie is supposed to look slightly wet and jiggly in the center (about a 4-inch radius) when you pull it out of the oven. The pie will continue to cook for several minutes post-oven bake, and should reach a proper fully-baked texture once completely cooled.
Decrease the cooling temperature gradually
I apply the same method for preventing my cheesecake from cracking and allow my pumpkin pie to cool slightly in the oven with the door open before removing it to finish cooling on the counter. Once baked and the oven has been turned off, I prop the oven door open for about 10-minutes before transferring it to the counter so that the pie cools in a more gradual manner. This prevents the jarring temperature change of hot oven to cool counter and can help prevent a cracked top.
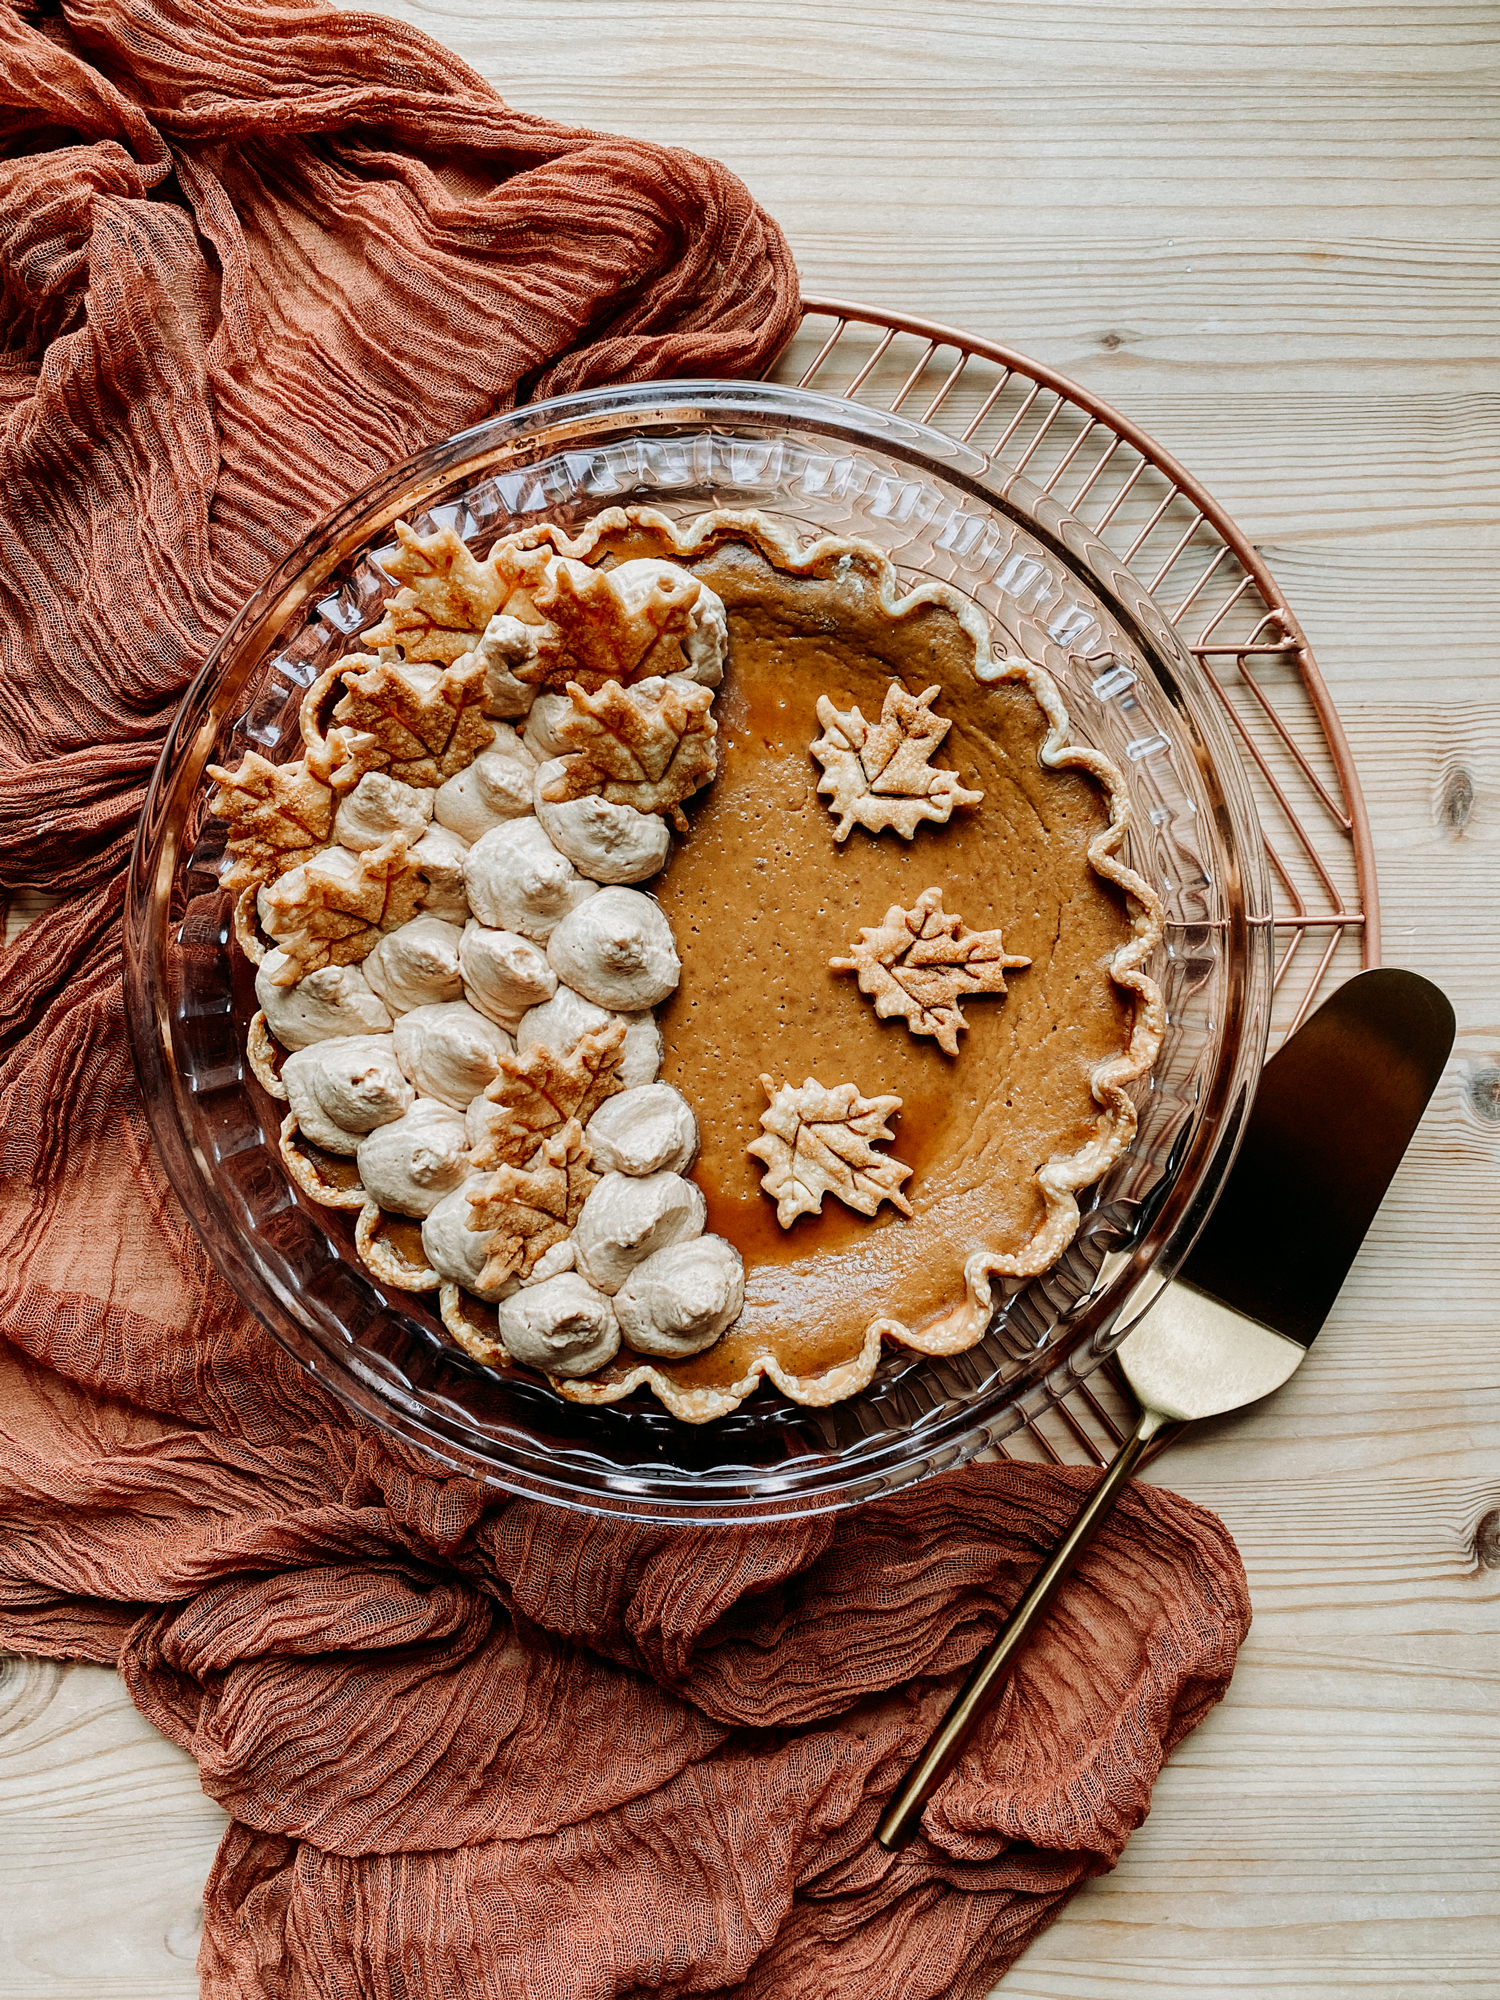
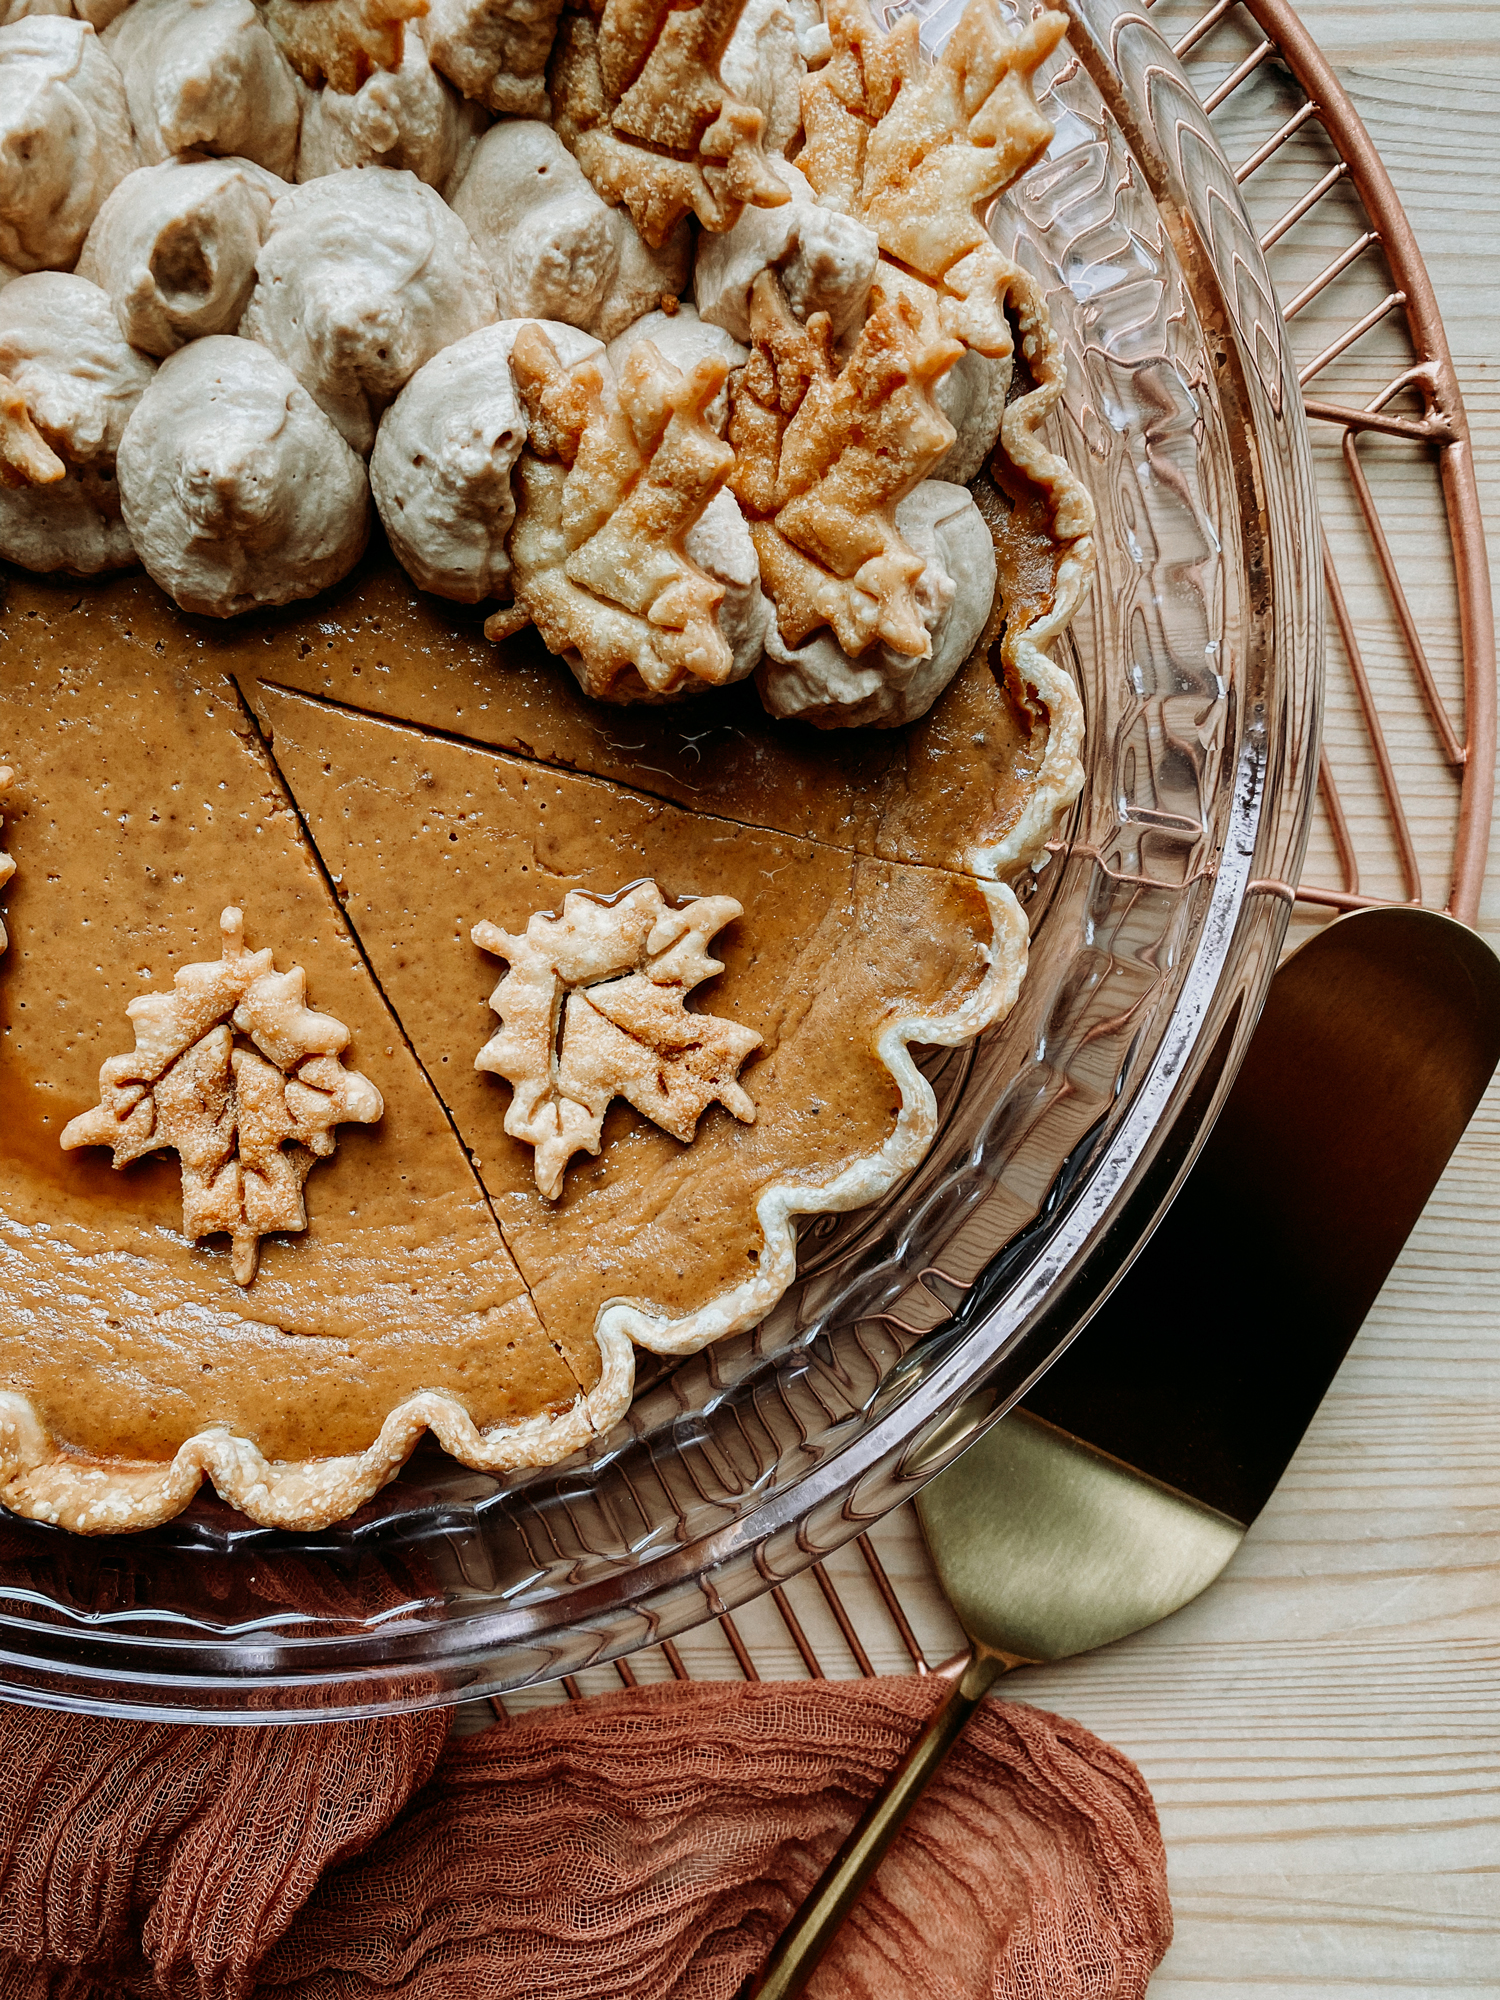
How to top your Maple Pumpkin Pie
I love to top this Maple Pumpkin Pie with maple sugar-dusted pie crust leaves (included in the recipe card) and whipped cream. These are my 4 favorite options for whipped cream:
- Classic whipped cream - Chilled heavy cream whipped until thick, dense, and smooth with no sweeteners
- Maple whipped cream - Add 1 tablespoon maple syrup for every 8 oz/1 cup chilled heavy cream prior to whipping. Then whip as per usual.
- Maple whipped toasted cream (what I used in the images of this post) - Add 1 tablespoon maple syrup for every 8 oz/ 1 cup chilled toasted cream -- Here's my recipe for Pressure Cooker Toasted Cream. I find that toasted cream does not remain emulsified with maple syrup for long periods of time so you'll want to prepare and serve it just before serving to avoid the maple syrup weeping out before it's enjoyed.
- Dairy-free coconut whipped topping - Though we consume dairy, I almost always have a container of this dairy-free coconut whipped topping in my freezer because we love the texture and flavor. Enjoy frozen or defrost in the fridge the night before for a classic whipped topping texture.
What tools do I need to make this recipe?
- A large (9 - 9 ½-inch) deep-dish pie pan
- A large mixing bowl
- A whisk
- A kitchen scale
- Measuring spoons
- A can opener
- A silicone spatula
- Silicone pie crust shield (nice to have, but not essential)
If you choose to par-bake / partially blind-bake your pie crust you will also need:
- Parchment paper
- Dried beans or pie weights
If you choose to make the optional toppings you will also need:
For the maple sugar-dusted pie leaves -
- A baker's half sheet
- Parchment paper
- A basting brush
For the maple whipped toasted cream -
Are you looking to upgrade to your cooking tools or replenish your pantry? Check out my kitchen tools shop page and pantry staples shop page to find my must-have kitchen tools, pantry items, and other Whip & Wander favorites.

Looking for more holiday dessert inspiration?
- Pumpkin Spice Bundt Cake with Maple Bourbon Butterscotch Sauce
- Blood Orange Cheesecake (low-carb and gluten-free)
- Spiced Pear Crisp
- Molly Weasley's Nut Brittle
- Professor McGonagall's Ginger Newt Biscuits

Maple Pumpkin Pie
- Prep Time: 15 minutes
- Cook Time: 60 minutes
- Total Time: 1 hour 15 minutes
- Yield: 8 servings 1x
- Category: Desserts
- Method: Oven
- Cuisine: American
Description
Pumpkin Pie has always been my favorite type of pie so I'm always thrilled to serve this Maple Pumpkin Pie on my table during the holidays. The pumpkin filling is sweetened with pure maple syrup and imbued with vanilla and warm spices, including cinnamon, nutmeg, ginger, and cloves. I love to serve this updated version of classic pumpkin pie with maple sugar-dusted pie crust leaves and a big dollop of maple toasted whipped cream.
Ingredients
- 1 unbaked round of pie dough
- 15 oz pumpkin puree
- 225 g (about ¾ cup) pure maple syrup
- 3 large eggs
- 12 oz evaporated milk
- 2 tsp vanilla extract
- 1 tsp ground cinnamon
- ½ tsp ground nutmeg
- ½ tsp ground ginger
- ¼ ts ground cloves
- ½ tsp Kosher salt
Optional toppings:
- Maple-dusted pie crust leaves
- 1 unbaked round of pie dough
- 1 tbsp unsalted butter, melted
- 1-2 tablespoon maple sugar
- Maple whipped toasted cream
- 2 cups toasted cream, chilled
- 2 tbsp maple syrup
Instructions
Prepare the crust
- If you prefer to par-bake / partially-blind bake your pie crust (for a crisp bottom crust):
- Roll your pie crust out into a 12-inch round. Carefully place the dough into a large (9 - 9 ½-inch) deep-dish pie pan and crimp the edges as desired. Dock the bottom of the pie crust with a fork. If your crust has softened slightly is no longer chill at this point place it back in the fridge for 20-minutes to chill first for best results.
- Once it's ready to par-bake, line the pie crust with a piece of parchment paper and fill with dried beans or pie weights.
- Bake at 425 degrees F / 220 C for 12-15 minutes or until the crust looks dry and is just starting to turn lightly golden. Carefully remove the pie weights and the parchment paper. Allow crust to cool slightly while you prepare the pumpkin pie filling.
- If you prefer to bake your pie in a crust that has not been par-baked / partially blind-baked (for a chewier bottom crust):
- Roll your pie crust out into a 12-inch round. Carefully place the dough into a large (9 - 9 ½-inch) deep-dish pie pan and crimp the edges as desired. Dock the bottom of the pie crust with a fork. If your crust has softened slightly is no longer chill at this point place it back in the fridge for 20-minutes to chill first for best results.
For the filling:
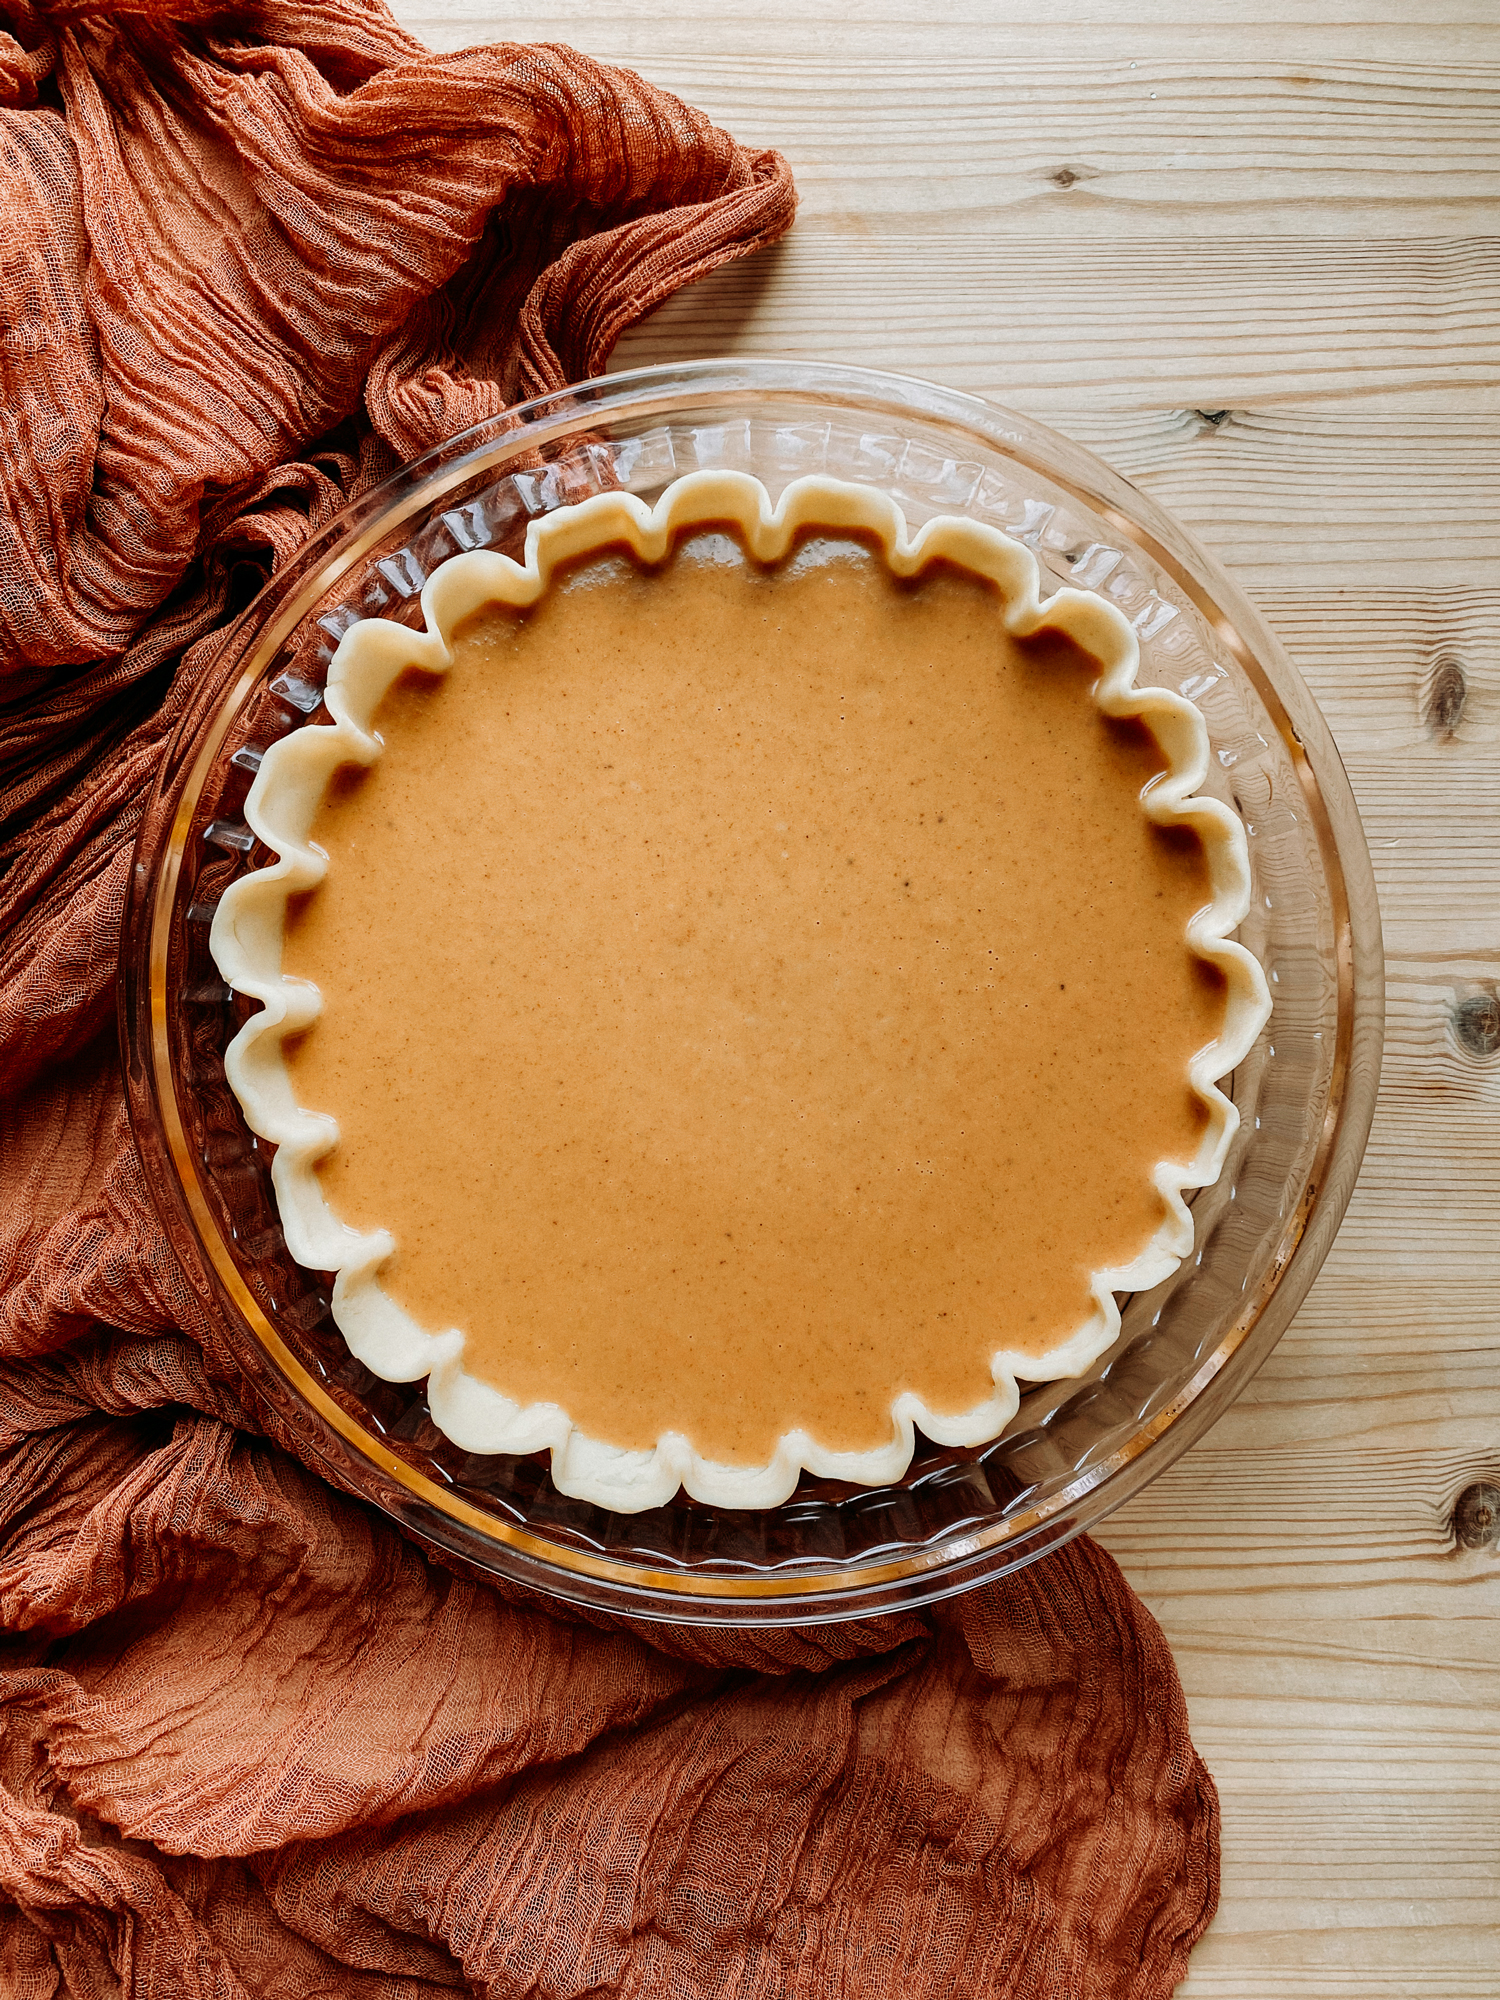
- In a large mixing bowl, add the pumpkin puree, maple syrup, and eggs, then whisk to combine.
- Add the evaporated milk, vanilla extract, cinnamon, nutmeg, ginger, cloves, and salt and whisk until fully combined and smooth.
- Pour filling into your reserved pie shell (par-baked or raw), scraping the bowl with a silicone spatula.
To bake:
- If you have par-baked your pie crust:
- Lower the oven heat to 350 degrees F / 175 C. and bake the pie for 40-45-minutes. If you find that your pie crust starts browning too quickly once it is returned to the oven, you can cover the edges with tin-foil or these silicone pie crust covers to help prevent over-browning. When finished, the edges should have deepened in color and look set and the inner 4-inches of the pie should look just slightly wet and jiggly. Turn the oven off and prop the door open wide. Allow the pie to cool in the oven for 10-minutes before transferring to the counter to finish cooling. This will help prevent the pie from cracking.
- If you opted to not par-bake your pie crust:
- Preheat your oven to 425 degrees F / 220 C. Bake the pie for 15-minutes. Then lower the heat to 350 degrees F / 175 C and continue baking the pie for 40-45-more minutes. If you find that your pie crust starts browning too quickly once it is returned to the oven, you can cover the edges with tin-foil or these silicone pie crust covers to help prevent over-browning. When finished, the edges should have deepened in color and look set and the inner 4-inches of the pie should look just slightly wet and jiggly. Turn the oven off and prop the door open wide. Allow the pie to cool in the oven for 10-minutes before transferring to the counter to finish cooling. This will help prevent the pie from cracking.
For the optional maple sugar-dusted pie leaves:
- Preheat oven to 350 degrees F / 175 C. Prep a bakers half-sheet with parchment paper and reserve to the side.
- Roll your pie crust into a 12-inch round. Cut out leaves using a leaf-shaped pastry-cutter and place each on the reserved parchment-lined baking sheet. Bruss each leaf with melted butter then sprinkle with maple sugar.
- Bake pie leaves for 10-12 minutes or until lightly golden. Reserve to the side to cool until ready to top your pie.
For the optional maple whipped toasted cream:
- In a large bowl or medium Weck jar combine the chilled toasted cream and maple syrup. If you're using the jar, you can use an immersion blender to whip the cream or if you're using a mixing bowl you can use a hand mixer to whip until thick and fluffy. I find that toasted cream does not remain emulsified with maple syrup for long periods of time so you'll want to prepare and serve it just before serving to avoid the maple syrup weeping out before it's enjoyed.
Notes
We have determined the nutritional value of oil for frying based on a retention value of 10% after cooking. The exact amount may vary depending on cook time and temperature, ingredient density, and the specific type of oil used.
Nutrition
- Serving Size: 1 slice pie (without optional toppings)
- Calories: 254
- Sugar: 22 g
- Sodium: 252 mg
- Fat: 10 g
- Saturated Fat: 4 g
- Carbohydrates: 37 g
- Fiber: 2 g
- Protein: 6 g
- Cholesterol: 13 mg
Mike says
Yum!